
TL;DR

Get business pricing on tools and workshop supplies
- Business-only prices and quantity discounts
- Tax-exempt purchasing
- Multiple users, one account, clear invoices
Organizing a wide-mouth tool bag is about creating quick access and proper weight balance. Use categorized compartments, inserts, and regular upkeep to keep your tools ready and your bag lasting longer.
Ever reach into your tool bag, only to fumble around for that one screwdriver? It’s frustrating, slow, and wastes precious time. A wide-mouth tool bag makes access easier, but without smart organization, it quickly becomes a jumbled mess.
In this guide, you’ll discover how to arrange your bag so tools are visible, accessible, and protected. This isn’t about just tossing tools in — it’s about making your workday smoother and your tools last longer.
Categorize tools into logical groups for faster access.
Use dedicated compartments, foam inserts, or small containers to keep tools secure and visible.
Distribute weight evenly to prevent fatigue and bag tipping.
Regularly clean and declutter to extend your bag’s lifespan.
Invest in durable, water-resistant materials for long-lasting use.
How to Organize a Wide-Mouth Tool Bag
Fast access begins with a deliberate layout. Categorize your tools, secure every small part, balance the load, and maintain the system so the tool you need is always visible and ready.
Build three clear access zones
A wide opening improves visibility, but it cannot prevent clutter on its own. Assign every tool to a zone based on weight, frequency of use, and risk of damage.
Daily drivers
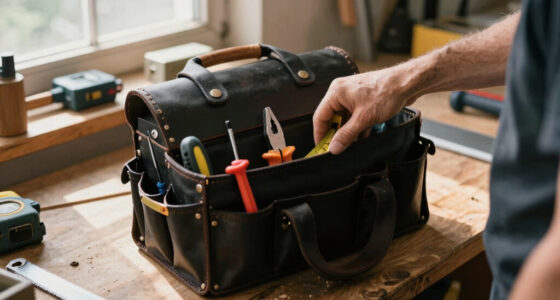
Keep your most-used screwdrivers, pliers, tape, and tester upright in exterior or upper pockets. Handles should remain visible for one-motion retrieval.
Specialized tools
Place meters, delicate tools, and job-specific gear in padded dividers or foam inserts. Separate sharp edges from calibrated equipment.
Heavy anchors
Position hammers and large wrenches low and close to the center. A stable base reduces tipping, shoulder strain, and impact on fragile items.
The balance target
Weight centered over the reinforced baseFrom tool pile to working system
Group by category
Gather screwdrivers, pliers, wrenches, cutting tools, and electrical gear into separate groups. Remove duplicates and job-irrelevant items before anything goes back.
Use dedicated compartments
Give each category a pocket, sleeve, divider, or insert. Keep frequent-use tools near the top and orient handles consistently so the layout becomes easy to scan at a glance.
Load heavy tools low
Place hammers, large wrenches, and batteries at the bottom or in reinforced sections. Split weight evenly from side to side to reduce fatigue and prevent tipping.
Add inserts and containers
Use foam for delicate tools and lidded containers for fasteners, blades, and bits. These barriers prevent movement, absorb shocks, and protect finishes and calibration.
Declutter every week
Remove broken, worn, obsolete, or unused equipment. Refill consumables and return misplaced tools to their zones. A lighter, current loadout is safer and faster to use.
Every organizing choice creates a workday advantage
The system works as a connected loop: visibility supports faster retrieval, secure storage limits damage, and routine resets preserve both benefits.
Group tools
Similar items occupy one predictable zone.
Make them visible
Handles, labels, and colors create a visual map.
Retrieve faster
Less rummaging means fewer interruptions.
Protect the load
Dividers stop impacts, scratches, and loss.
Reset the system
Regular upkeep restores every assigned zone.
Less time spent searching
The reported efficiency gain is the organizing benchmark: make common tools immediately identifiable and reachable.
Choose the right insert for the job
No single organizer solves every storage problem. Combine protection, flexibility, and containment according to the tools you carry most often.
| Organizer | Best use | Advantages | Limitations |
|---|---|---|---|
| Removable foam inserts | Delicate, calibrated, or high-value tools requiring a fixed position. | ✓Custom fit, shock absorption, strong protection, and clear missing-tool visibility. | ✕Higher cost, cleaning needs, and less flexibility when the tool collection changes. |
| Pocket dividers | Screwdrivers, pliers, wrenches, and mixed everyday hand tools. | ✓Lightweight, flexible, quick to rearrange, and efficient for upright storage. | ✕Limited impact protection; loose or undersized tools may still shift in transit. |
| Small plastic containers | Bits, blades, anchors, terminals, fasteners, and other tiny components. | ✓Prevents loss, enables labeling, and makes small parts easier to identify. | ✕Consumes interior volume and can add weight or slow access when overused. |
Practical combination / dividers for daily tools + one foam insert for delicate equipment + one labeled container for small parts.
Keep the tools—and the bag—in working shape
Clean before storing
Wipe away water, dirt, and jobsite residue to reduce rust, corrosion, and contamination inside the bag.
Inspect for wear
Check for cracks, loose handles, dull blades, damaged insulation, and other safety-critical defects.
Label and color-code
Create a visual map for tool categories, small-part containers, and job-specific modules.
Protect the bag
Choose water-resistant, tear-resistant nylon or polyester and inspect zippers, seams, and straps.
Common tool-bag questions
How often should I reorganize the bag?
Review it weekly and after major projects. Remove worn or unused tools and adjust compartments whenever your working kit changes.
How do I stop tools from falling out?
Use snug pockets, lidded containers, and secured dividers. Keep tall tools upright and avoid overfilling the wide opening.
Can the layout change for each trade?
Yes. Removable foam, modular organizers, and labeled containers let you create dedicated electrical, plumbing, or carpentry loadouts.
What is the fastest cleaning habit?
Wipe every tool before it goes back. Clean the interior with a damp cloth as needed, then leave the bag open until completely dry.
A tidy bag is a faster, safer workflow.
Organize around visibility, access, protection, and balance. A few intentional zones—and a weekly reset—save time, reduce strain, and help both your tools and bag last longer.
Why Your Wide-Mouth Tool Bag Needs a Smart Layout
The right setup makes all the difference. Wide-mouth bags give you easy access, but that can lead to chaos without a plan. When you organize properly, you find tools faster, avoid damaging your gear, and reduce strain on your body.
Imagine reaching for a plier. Instead of rummaging, you instantly grab it from a dedicated pocket. That’s the power of smart layout.
wide-mouth tool bag organizer inserts
As an affiliate, we earn on qualifying purchases.
As an affiliate, we earn on qualifying purchases.
Step-by-Step: How to Organize Your Wide-Mouth Tool Bag
- Sort your tools by category. Gather screwdrivers, pliers, wrenches, etc. Group similar items together for easy access. This reduces the time spent searching and minimizes the risk of overlooking essential tools, which can delay work or lead to using improper substitutes.
- Use dedicated compartments. Place each category into separate pockets or inserts. Keep frequently used tools near the top for quick grab-and-go convenience. Proper compartmentalization prevents tools from shifting during movement, which can cause damage or create clutter that obscures other tools.
- Distribute weight evenly. Heavier tools like hammers or large wrenches should go at the bottom or in reinforced sections. This helps maintain the bag’s balance, reduces strain on your back and shoulders, and prevents tipping or uneven wear. Proper weight distribution also safeguards fragile tools from accidental impacts.
- Add organizers or foam inserts. Use small containers or foam pads to keep small parts from bouncing around. These inserts absorb shocks and prevent scratching or chipping, prolonging the lifespan of delicate tools and maintaining their calibration.
- Declutter regularly. Remove worn or unused tools to keep your bag light and efficient. Regularly assessing your toolkit ensures you carry only what’s necessary, which reduces fatigue and speeds up your work process. It also prevents the accumulation of broken or obsolete tools that can cause delays or safety hazards.
As an affiliate, we earn on qualifying purchases.
Compare Different Organizer Options to Maximize Space
| Type of Organizer | Pros | Cons |
|---|---|---|
| Removable Foam Inserts | Customizable, protects tools, absorbs shocks, and prevents movement during transit, which extends tool life and reduces damage risks. | Can be costly, needs maintenance to keep clean, and may require adjustment as your tool collection evolves. |
| Pocket Dividers | Easy to rearrange, lightweight, and flexible for customizing compartments to different tools or projects, improving organization efficiency. | Limited protection for small parts or delicate tools; items may shift if not secured properly, leading to potential damage or loss. |
| Small Plastic Containers | Keeps tiny parts secure, prevents loss, and makes identifying small items easier, which speeds up work and reduces frustration. | Takes up space inside the bag, can be hard to access quickly if overused, and may add weight if not chosen carefully. |
As an affiliate, we earn on qualifying purchases.
Tips to Keep Your Tools in Top Shape and Your Bag Organized
- Clean tools before storing. Wiping tools thoroughly before putting them back reduces the risk of rust, corrosion, and dirt buildup. This maintenance not only preserves the tools’ functionality but also prevents the spread of contaminants that can cause damage over time. Regular cleaning is a small step that significantly extends the lifespan of your investment and ensures your tools perform precisely when needed.
- Check for worn-out tools. Regular inspection for cracks, loose handles, dull blades, or other signs of wear is crucial. Damaged tools can lead to safety hazards, such as breakage during use, or produce subpar work. Replacing or repairing worn tools maintains your safety standards and ensures consistent performance, which ultimately saves money and time by avoiding work stoppages due to equipment failure.
- Use labels or color coding. Implementing labels or color coding helps create a visual map of your toolkit. This is especially useful in high-pressure situations where seconds matter. Clear labels reduce the mental load of remembering tool locations, minimize errors, and keep your workflow efficient. Over time, this system can be refined to match your specific needs, making your organization intuitive and second nature, which directly translates into increased productivity and safety.
- Maintain your organization system. Regularly review and tidy your bag—weekly or after major projects. Tools can shift, pockets can stretch, and small items can get misplaced. Routine checks prevent clutter from accumulating and ensure that your organization remains effective. Maintaining this discipline reduces the risk of losing tools, prevents accidental damage, and keeps your work environment safe by avoiding misplaced sharp or heavy objects.
As an affiliate, we earn on qualifying purchases.
How to Keep Your Wide-Mouth Bag Durable and Clean
Durability starts with the right material. Look for bags made from water-resistant, tear-proof fabrics like heavy-duty nylon or polyester. These materials resist the wear and tear of daily use and exposure to the elements, extending the lifespan of your bag.
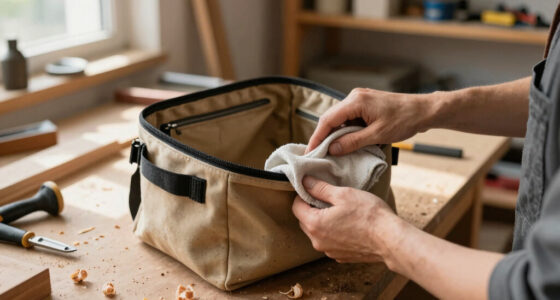
Regular cleaning with a damp cloth prevents dirt buildup and keeps your bag looking new. For example, after a muddy job, wipe down your bag with a microfiber cloth and let it air dry. Check zippers and straps for wear and tear. Addressing small issues early prevents larger damage, saving money and prolonging your bag’s usability.
Frequently Asked Questions
How often should I reorganize my tool bag?
Aim to review and tidy your bag weekly. Remove worn or unused tools, and adjust compartments if your tool collection changes.What’s the best way to prevent tools from falling out?
Use secure pockets, small containers, and label compartments. Keep frequently used tools at the top or in quick-access sections.Can I customize my bag for specific jobs?
Absolutely. Use foam inserts or removable organizers to tailor your bag for electrical work, plumbing, or carpentry. It’s about fitting tools to your workflow.What’s a quick tip to keep my bag clean?
Wipe down your tools after every use and periodically scrub the inside with a damp cloth. Check zippers and straps for damage and repair promptly.Conclusion
A well-organized wide-mouth tool bag transforms how you work. It’s not just about saving seconds — it’s about protecting your tools and reducing stress. Spend a little time setting up your bag right, and you’ll see the difference every day.
Remember, a tidy bag isn’t just neat — it’s smart. Your tools will thank you, and so will your back after a long day.
Halloween Picks
halloween
As an affiliate, we earn on qualifying purchases.