
TL;DR
Listen free for 30 days with Audible
Thousands of audiobooks and originals — cancel anytime.
Start your free trialAs an affiliate, we earn on qualifying purchases.
Weatherproofing outdoor tool storage involves choosing the right materials, elevating the structure, sealing joints, and controlling condensation. These steps prevent rust, leaks, and damage, extending the life of your tools. Proper maintenance is key to lasting protection.
If you’ve ever opened your outdoor shed only to find rusty, damp tools or a drenched workbench, you know how frustrating weather can be. Protecting your tools from rain, snow, and humidity isn’t just about buying a shed — it’s about making it tough enough to face the elements. This guide walks you through practical, proven steps to weatherproof your outdoor tool storage, so your gear stays dry and ready to use.
Whether you’re updating an old shed or designing a new one, understanding the key elements — materials, elevation, sealing, ventilation, and maintenance — makes all the difference. Let’s dive into how you can turn a simple storage box into a fortress against the weather.
Choose durable, weather-resistant materials like UV-treated resin or coated metal for minimal ongoing maintenance.
Elevate your shed at least 2 inches above ground and ensure proper drainage to prevent ground moisture from seeping in.
Seal all seams, joints, and penetrations with exterior caulk and weatherstripping to keep water out.
Control internal humidity with vents and desiccants to prevent rust on your tools.
Regular maintenance, including re-sealing and inspecting, keeps your storage weatherproof year after year.
How to Weatherproof Outdoor Tool Storage
Rain from above is only half the battle. Lasting protection comes from five moves — the right material, real elevation, sealed joints, controlled condensation, and a maintenance rhythm — that turn a simple storage box into a fortress against the weather.
“Condensation inside a metal shed rusts tools even when the shed is fully waterproof. Ventilation and insulation beat sealing alone.”
Warm, moist air hitting cold metal forms droplets. The fix is managing internal humidity — not adding more sealant.
Pick the Right Material to Resist Weather and Wear
Your material choice sets the foundation for everything else. It determines how well the structure shrugs off water, sun, and cold — and how much weekend work it demands back from you.
The Low-Maintenance Shield
High-density polyethylene is naturally rot- and rust-proof, especially with UV inhibitors. Double-wall, blow-molded designs add insulation and wind resistance.
- Never rots or rusts; UV-treated versions resist fading
- New vented designs reduce condensation complaints
- Can turn brittle in extreme cold; heat warps lids
The Classic — At a Price
Attractive and sturdy, but the highest maintenance of the three. Needs pressure-treated, ground-contact-rated lumber or rot-resistant species like cedar and redwood.
- Looks great; naturally insulates against condensation
- Easy to repair, modify, and re-seal
- Re-stain every 1–3 years or rot and mold move in
| Criteria | Resin (HDPE) | Galvanized Metal | Wood |
|---|---|---|---|
| Rot & rust resistance | ✓Inherently immune to both | ∼Good while coating stays intact | ✗Rots without regular sealing |
| UV & sun exposure | ∼Needs UV-treated formulation or shade | ✓Paint/powder coat holds up well | ∼Finish degrades; re-stain on schedule |
| Extreme cold | ✗Resin can embrittle and crack | ✓Unaffected structurally | ✓Handles cold well |
| Condensation behaviour | ∼Needs vents; newer designs include them | ✗Worst offender — cold metal sweats | ✓Breathes naturally |
| Ongoing maintenance | ✓Lowest — wash and inspect | ∼Touch up coating at scratches | ✗Highest — seal every 1–3 years |
The Five-Step Weatherproofing Chain
Each link defends against a different failure mode. Skip one, and the weather will find it.
Choose Material
UV-treated resin or well-coated metal for the least ongoing work.
Raise the Base
2–4 in above grade; slope ground away so runoff never pools.
Seal Every Seam
Exterior silicone or polyurethane caulk; gaskets and weatherstripping on lids and doors.
Vent & Dry
High/low cross-vents, vapor barriers, silica gel or calcium chloride desiccants.
Maintain Yearly
Re-caulk, touch up coatings, clear roof debris, brush off snow loads.
Condensation: manage humidity, don’t chase airtight
A perfectly sealed box traps moist air inside, where it condenses on cold metal and rusts your tools. The goal is a balanced interior: vents let damp air escape, desiccants absorb what remains, and vapor barriers block ground moisture from rising through the floor. Dry tools before storing them — never seal them in damp.
Where the Water Actually Gets In
Most storage failures don’t come from rain falling on the roof — they creep in from below, through seams, and out of the air itself. Prioritize your defenses accordingly.
Relative threat level by entry route
Qualitative ranking based on common failure patterns reported for outdoor sheds and deck boxes.
Elevation Rule of Thumb
A shed sitting directly on grade can wick water under the base within one rainy week. Gravel beds, concrete pavers, or a treated-wood platform promote runoff and keep the floor dry.
- YearlyRe-caulk failed seams, touch up paint or powder coat, test door gaskets.
- 1–3 yrsRe-stain or re-seal wooden sheds; refresh UV coatings on resin in full sun.
- Per stormBrush snow off roofs — snow load is a leading cause of collapse on budget sheds.
- SeasonalReplace desiccant packs; confirm anchors hold — many warranties require them.
Threat → Defense → Payoff
Every weatherproofing move answers a specific threat. Trace the chain before you spend a dollar.
Threat
Driving rain through seams, lids & roof overlaps
Defense
Exterior caulk, rubber gaskets, weatherstripping, drip edges
Payoff
A dry interior, even in heavy storms
Threat
Ground moisture wicking up through the base
Defense
2–4 in elevated foundation on gravel or pavers, ground sloped away
Payoff
No pooling, no soggy floor, no rust line
Threat
Trapped humidity condensing on cold metal
Defense
High/low cross-vents, vapor barrier, silica gel or VCI liners in toolboxes
Payoff
Rust-free tools and no mold or mildew
Threat
UV rays and freeze-thaw temperature swings
Defense
Shade placement, UV-resistant coatings, UV-treated materials
Payoff
Material lifespan can roughly double
Pick the Right Material to Resist Weather and Wear
Your choice of material sets the foundation for weatherproofing. Resin sheds made from high-density polyethylene (HDPE) are naturally rot- and rust-proof, especially if treated with UV inhibitors. Metal sheds, usually galvanized steel or aluminum, are tough but need a fresh coat of paint or powder coating to stop rust. Wooden sheds look great but require regular sealing and maintenance.
For example, a resin shed with double-wall construction offers better insulation and wind resistance. Metal sheds with zinc-aluminum coatings resist corrosion longer. Wooden sheds need pressure-treated lumber or rot-resistant species like cedar, plus sealing every 1–3 years.
Choosing the right material depends on your climate and budget, but resin and well-coated metal tend to require less ongoing work and resist weather longer. The material affects durability because it determines how well your shed can withstand environmental stresses. For instance, untreated wood may look attractive but can absorb moisture, leading to rot and mold if not maintained regularly. Conversely, resin or coated metal creates a barrier that resists water penetration, reducing the frequency and effort of maintenance, and providing a more reliable shelter over time. Selecting the right material is an investment in reducing long-term repair costs and ensuring your tools stay protected in harsh conditions.
As an affiliate, we earn on qualifying purchases.
Ensure Proper Elevation and Ground Drainage
The biggest enemy of outdoor storage isn’t just rain falling from above — it’s ground moisture seeping in. Placing your shed on a solid, level foundation keeps water at bay. Use gravel beds, concrete pavers, or a treated-wood platform that’s at least 2–4 inches above grade.
For instance, I once saw a metal shed sitting directly on muddy ground. After just one rainy week, water seeped under the base, causing rust inside and soggy tools. Elevation and proper drainage prevent these problems.
Always slope the ground away from your shed, and avoid low spots or puddles. Proper elevation and drainage are crucial because they prevent water from pooling around or underneath the shed, which can lead to persistent dampness and eventual structural damage. When water collects at the base, it can wick up into walls or seep through joints, accelerating rust and decay. An elevated foundation reduces this risk by promoting runoff and keeping the shed’s base dry. This simple but vital step extends the lifespan of your shed and preserves your tools by maintaining a dry environment inside. It’s about creating a barrier that actively directs water away, rather than allowing it to linger and cause harm.
outdoor tool storage waterproof sealant
As an affiliate, we earn on qualifying purchases.
As an affiliate, we earn on qualifying purchases.
Seal All Seams, Joints, and Penetrations to Keep Water Out
Leaks happen mostly at seams, joints, or around vents and doors. Use exterior-grade silicone or polyurethane caulk to seal gaps, cracks, and seams. Rubber gaskets or weatherstripping on doors and lids create a tight seal that stops water entry.
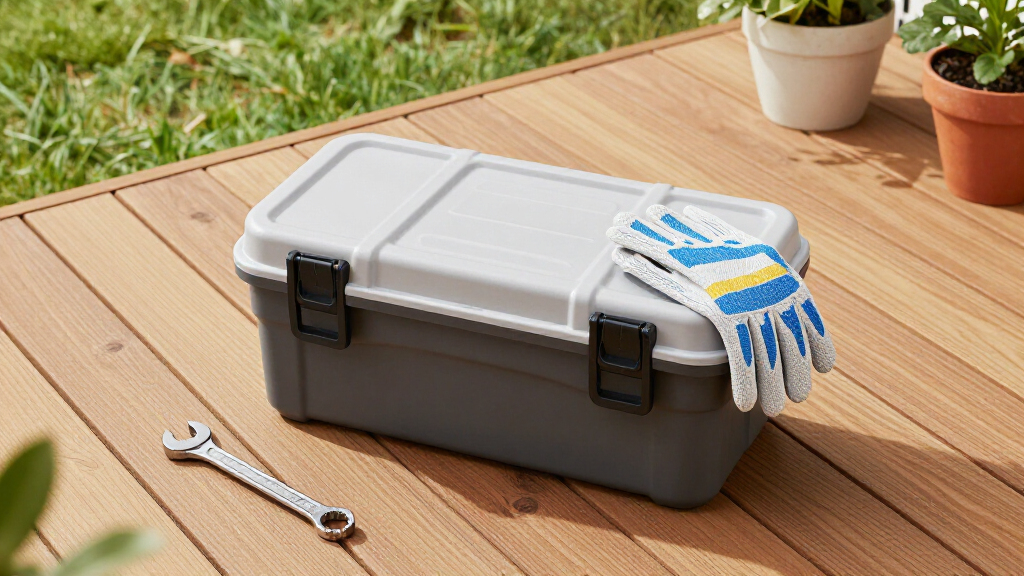
For example, a deck box I knew leaked every time it rained because the lid didn’t seal well. Adding a gasket and caulking around the edges kept water out, even during heavy storms.
Pay special attention to roof overlaps, panel joints, and any penetrations for vents or electrical wiring. Properly sealed panels and well-installed gaskets prevent water from seeping through tiny cracks or gaps that might otherwise seem insignificant. Over time, small leaks can lead to significant damage, including rust, mold, and rot. Sealing these entry points is an investment in the longevity of your shed and the safety of your tools. It’s important to understand that water intrusion often occurs in unexpected places, and neglecting to seal joints can compromise the entire structure’s weather resistance. By diligently sealing all potential entry points, you create a robust barrier that significantly reduces the risk of water damage, ensuring your shed remains dry and your tools stay protected.
As an affiliate, we earn on qualifying purchases.
Control Condensation and Prevent Rust Inside
Condensation is the sneaky enemy inside any metal or plastic shed. Warm, moist air hits cold metal surfaces, forming water droplets that cause rust on tools. Installing vents at high and low points, using vapor barriers, and employing desiccants like silica gel can tame this moisture. The key is managing internal humidity because high humidity levels accelerate rust formation. Without proper ventilation, even a waterproof shed can become a breeding ground for rust, mold, and mildew, which can compromise your tools and the shed’s integrity. Installing passive vents at strategic points allows moist air to escape naturally, preventing buildup. Using vapor barriers beneath flooring and inside walls reduces the transfer of moisture from outside. Desiccants like silica gel absorb excess moisture, especially in enclosed spaces. These measures work together to create a balanced environment where humidity remains low enough to prevent rust, but not so sealed that stale air causes other issues. Managing condensation effectively means your tools will stay dry and rust-free, prolonging their usability and saving you money on replacements.
This isn’t about making a perfectly airtight box — it’s about managing humidity. Ventilation and moisture absorbers are your best allies because they allow excess moisture to escape and keep the internal environment stable. The tradeoff is between ventilation that might let in some dust and moisture, versus complete sealing that traps humidity. Striking the right balance is essential for long-term protection. By understanding and controlling condensation, you ensure your shed remains a safe haven for your tools in all weather conditions.
rust-resistant outdoor storage cabinet
As an affiliate, we earn on qualifying purchases.
As an affiliate, we earn on qualifying purchases.
Protect Your Storage from Sun and Extreme Temperatures
UV rays and temperature swings degrade plastics and finishes. Keep plastic sheds in the shade or coat them with UV-resistant paint. Extreme cold makes resin brittle, while heat warps plastic lids. Choosing UV-treated materials and providing shade prolongs life and keeps tools safe.
For example, a plastic shed in direct sun cracked after a winter freeze—replacing it with one in the shade and adding a UV coating doubled its lifespan.
In hot climates, consider installing shade cloth or positioning your shed under trees. In cold zones, insulate or avoid plastic parts that are prone to cracking. Sun and extreme temperatures can cause materials to weaken, warp, or crack over time, compromising the shed’s ability to protect your tools. UV radiation breaks down plastic polymers, leading to brittleness and surface deterioration, while temperature fluctuations cause expansion and contraction that can crack joints or warp panels. Protecting your shed from these elements by placing it in shaded areas or applying UV-resistant coatings helps maintain its structural integrity. In colder regions, insulating or choosing temperature-tolerant materials prevents brittleness and cracking, ensuring your shed remains functional and protective for many years. Properly shielding your shed from sun and cold is an investment in its longevity and your tools’ safety.
Prevent Rust on Tools with Simple Protective Measures
A light coat of machine oil or paste wax on metal tools creates a barrier against moisture. Using vapor corrosion inhibitors (VCI) or silica gel inside toolboxes adds ongoing protection. These small steps keep rust at bay. Regularly wiping tools before storage, especially after exposure to rain or dew, reduces moisture contact and rust formation. The tradeoff is that these protective measures require periodic reapplication or replacement, but they are simple and cost-effective compared to cleaning rust later. Using VCI paper or gels inside storage containers can provide a continuous protective environment, especially in humid climates. The key is understanding that preventing rust isn’t a one-time effort but an ongoing process that involves creating a barrier and controlling moisture. These simple measures significantly extend the life of your tools, saving money and effort in the long run. Proper storage and regular maintenance are essential for keeping tools in top condition, especially in challenging weather conditions.
Regularly wipe down tools before storage, especially after exposure to rain or dew. Small protective measures save big on cleaning and replacement later, and give you peace of mind knowing your tools are protected even in adverse weather. This proactive approach ensures your investment in quality tools pays off over time.
Secure and Anchor Your Shed Against Storms and Thieves
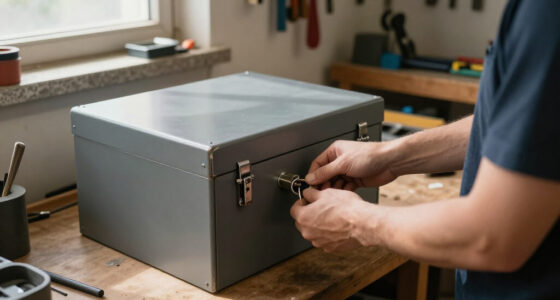
Weatherproofing isn’t just about keeping water out — it’s about staying put. Anchor your shed with wind-rated kits, especially in storm-prone areas. Lockable, gasketed lids keep water and thieves out.
For instance, a loose shed in a hurricane zone was blown over during a storm. Proper anchoring and a lockable lid would have prevented both theft and damage.
Check with local building codes for proper anchoring and storm considerations in your area. Proper anchoring provides resistance against high winds and prevents the shed from becoming a hazard or losing your tools. Using heavy-duty anchors or ground stakes, especially in areas prone to storms, reduces the risk of damage and theft. The tradeoff is that more robust anchoring systems may require more effort and initial investment, but they significantly improve safety and security. Securing your shed is a critical step in weatherproofing because even the best waterproofing measures won’t help if the structure is blown away or stolen. Think of anchoring as the foundation of your weatherproofing strategy — it ensures that all your efforts to keep water out are not wasted by structural failure or theft. Properly anchored sheds stay put, protecting your tools and investments through the worst weather.
Create a Maintenance Routine to Keep Weatherproofing Effective
Weatherproofing isn’t a one-time fix — it’s an ongoing process. Schedule an annual inspection to re-caulk seams, touch up paint, re-stain wood, and clear gutters. Regular upkeep prevents small issues from becoming big problems. Maintaining your shed’s seals and surfaces ensures that protective barriers remain effective over time. For example, reapplying sealant or paint every year helps prevent cracks and deterioration that could allow water ingress. Clear gutters and check for debris that could cause water to back up and leak into the structure. Regular inspections allow you to catch minor issues early, saving money and preventing major repairs later. Setting reminders for seasonal maintenance keeps your shed in top shape, ensuring continuous protection for your tools. Think of maintenance as a health check-up for your shed — proactive care extends its lifespan and keeps your storage environment dry and secure. A consistent routine means fewer surprises and more peace of mind, knowing your investment remains protected year after year.
Frequently Asked Questions
What material is best for outdoor tool storage to resist weather?
Resin sheds made from high-density polyethylene (HDPE) with UV inhibitors are the most weather-resistant and require minimal maintenance. Metal sheds with zinc-aluminum coatings also resist rust longer, especially if kept painted or coated. Wooden sheds are attractive but need regular sealing and are more maintenance-intensive.How do I prevent my tools from rusting inside an outdoor shed?
Use a light coat of machine oil or paste wax on metal tools and add silica gel packs or vapor corrosion inhibitors inside tool chests. Proper ventilation and drying tools before storage also greatly reduce rust risk, especially in humid climates.Do I need a foundation for my shed, and what’s the cheapest way?
A solid foundation is essential to prevent ground moisture from seeping in. The cheapest options include gravel beds or concrete pavers placed on level, well-drained ground. Elevated platforms or treated wood skids are also effective and affordable for DIY projects.How do I stop water from getting into my shed from above or below?
Seal all joints and seams with exterior caulking, install weatherstripping on doors, and ensure the roof has proper overlaps, drip edges, and gutters. Elevate the shed to prevent ground water intrusion and slope the ground away from the structure.Are resin sheds truly waterproof? Will they last in sun and cold?
Most resin sheds are waterproof when properly built, with gasketed lids and sealed panels. However, UV exposure can degrade plastics over time, and extreme cold can make resin brittle. Using UV-resistant coatings and placing sheds in shade extends their lifespan.Conclusion
Weatherproofing your outdoor tool storage isn’t about complicated DIY projects — it’s about simple, consistent steps. Elevate, seal, ventilate, and maintain. Your tools will thank you, lasting longer and staying rust-free, ready for the next job.
Think of your shed as armor for your tools. A little effort now means fewer surprises later — less rust, fewer leaks, and more time working instead of fixing. Protect your investment — your tools and your time depend on it.
Fall Picks
fall essentials
As an affiliate, we earn on qualifying purchases.