
TL;DR

Get business pricing on tools and workshop supplies
- Business-only prices and quantity discounts
- Tax-exempt purchasing
- Multiple users, one account, clear invoices
Riveting is a reliable, quick fix for repairing a tool belt. Using the right rivets and tools, you can restore strength in minutes. Regular checks prevent failures during work.
Use stainless steel rivets for the best corrosion resistance and longevity.
Always measure and match rivet size to the original for a secure fit.
Removing old rivets carefully prevents damage to the belt material.
Practice on scrap material first to perfect your technique.
Regularly inspect rivets on your tool belt to catch loose or damaged ones early.
Rivet a Tool Belt Repair That Holds Under Real Work
TL;DR: Riveting is a reliable, quick fix for a frayed or broken tool belt. Choose the right rivet, remove the old fastener gently, crimp the new one flush, and inspect it regularly so the repair stays strong instead of failing mid-job.
Stainless steel rivets can increase corrosion resistance by over 70% in damp or outdoor conditions.
Measure the original rivet diameter and length before buying replacements.
A secure rivet should sit tight against the belt material with no wiggle or snag.
Know when to rivet and when to reinforce.
A rivet repair works best when the damage is localized and the leather, fabric, or nylon around the hole is still firm. If the area is torn, stretched, or heavily frayed, add a patch or replace that section before installing a new rivet.
Quick test: tug the pouch or loop in the direction it normally carries weight. If the material flexes but does not tear or widen, a rivet replacement is usually worth doing.
Loose or Missing Fastener
Replace the damaged rivet when the original hole is clean, round, and surrounded by solid material.
Widened Hole
Add a washer, patch, or second rivet when the hole has stretched but the belt panel is still serviceable.
Torn Load Point
Skip a superficial fix if the pouch, loop, or belt body is tearing around the stress point.
Pick the fastener that matches the load.
Pop rivets are quick for light repairs. Solid stainless steel rivets take more effort but deliver the strongest, longest-lasting fix for high-stress tool belt points.
Best bet: use stainless steel for outdoor work, humid shops, and belts that carry heavy pouches every day.
| Type | Material | Best For | Durability | Repair Fit |
|---|---|---|---|---|
| Pop Rivets | Aluminum / Plastic | Quick fixes, fabric belts, lighter pouches | ~ Moderate | ✓ Fast DIY |
| Solid Rivets | Stainless steel / Brass | Leather loops, metal hardware, heavy stress | ✓ High | ✓ Longest life |
| Nylon Rivets | Plastic / Nylon | Synthetic belts with low load demand | ~ Light | ~ Limited stress |
| Bolts + Nuts | Steel hardware | Temporary or removable backup repairs | ~ Variable | ✗ Snag risk |
Rivet your tool belt like a pro.
Work slowly during removal, keep the hole clean, and practice once on scrap material if you have never used your rivet gun. The strongest repair comes from even pressure and a flush finish.
Do not rush removal: drilling too aggressively can enlarge the hole and weaken the repair before the new rivet is even installed.
Remove
Use a drill or punch to take out the damaged rivet without tearing the belt.
Clean
Wipe dirt, dust, and metal fragments away so the new fastener seats tightly.
Measure
Match the old rivet diameter and grip length to avoid a weak or oversized fit.
Align
Stack the belt layers evenly and push the rivet through the original hole.
Crimp
Set the rivet in the gun and squeeze with steady pressure until it locks.
Test
Check for wiggle, sharp edges, and snag points before loading the belt again.
Technique beats force.
A rivet should be tight, centered, and smooth. If it wiggles after installation, remove it and redo the repair rather than trusting a weak crimp under a loaded pouch.
Protect yourself, then protect the repair.
Riveting uses force, small metal parts, and sometimes power tools. A clear bench, eye protection, and steady posture make the repair cleaner and safer.
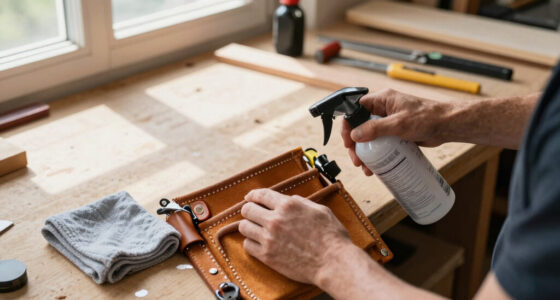
Maintenance tip: clean the belt after dusty jobs and apply a rust-resistant spray when the repair will face damp conditions.
Wear Eye Protection
Old rivet heads, drill shavings, and mandrels can fly loose during removal or crimping.
Stabilize the Belt
Clamp or hold the repair area flat so the hole stays aligned while you work.
Avoid Overpacking
Excess weight stresses the rivet and the surrounding belt material before its time.
Catch Looseness Early
Look for wobble, rust, widened holes, and torn edges every few months.
Repair risk rises when material damage extends beyond the rivet hole.
Trace the repair from inspection to maintenance.
This chain keeps the job practical: confirm the belt is worth repairing, match the rivet to the material, install it flush, and keep checking the stress points that carry the most weight.
Inspect
Find loose, missing, bent, or corroded rivets at pouches and belt loops.
Decide
Rivet localized damage; reinforce or replace torn material.
Match
Choose size, length, and material based on the original fastener.
Install
Align, crimp, and confirm the rivet sits flush and secure.
Maintain
Clean, inspect, and control load so the repair lasts for years.
Can I do it myself?
Yes. Most tool belt rivet repairs are DIY-friendly with a rivet gun, matching rivets, and careful alignment.
Which rivet gun works best?
A manual rivet gun is enough for occasional repairs. A pneumatic gun helps with thicker layers or repeated work.
How long will it last?
A properly sized stainless repair can last for years when the belt is not overloaded and rivets are checked regularly.
Know Your Rivets and Tools — Pick the Right One for the Job
Rivets are small, cylindrical fasteners that hold materials together with a permanent seal. The key is choosing the right type—pop rivets for quick fixes or solid rivets for heavy-duty repairs on metal belts. Your best bet? Stainless steel rivets for corrosion resistance, especially if you work outdoors or in damp conditions.
Pair these with a manual rivet gun for small repairs or a pneumatic rivet gun if you’re tackling multiple or thicker layers. The right setup makes the job smoother and the repair stronger.
Choosing the correct rivet type and tool impacts the longevity and strength of your repair. For example, pop rivets are easier to install and suitable for lighter materials, but may not withstand heavy stress or load over time. Solid rivets, though more demanding to install, provide a more durable, permanent fix—ideal for high-stress areas on your belt. Matching the tool to the rivet type ensures a secure fit and minimizes the risk of future failure, which is critical for safety and efficiency on the job.
stainless steel rivets for tool belt repair
As an affiliate, we earn on qualifying purchases.
As an affiliate, we earn on qualifying purchases.
Assess the Damage — When to Rivit and When to Replace
First, examine your tool belt carefully. Look for loose, bent, or missing rivets, especially at stress points like belt loops or pouch attachments. Damaged rivets are usually loose or have widened holes, which makes the repair pointless unless replaced.
If the fabric or leather around the rivet is torn or frayed, a rivet alone won’t do. Sometimes, a section needs reinforcement or full replacement. But small, intact areas can be fixed by simply rivet replacement—saving you time and money.
Understanding when to rivet versus replace is crucial because a superficial fix might not hold if the underlying material is compromised. Riveting works best when the damage is localized and the surrounding material is still strong and intact. If the damage involves extensive tearing, frayed edges, or weakened fabric, a full replacement ensures safety and durability, preventing sudden failure during work. Recognizing these signs helps you avoid wasting time on ineffective repairs and ensures your tool belt remains safe and functional.
Ignoring signs of extensive damage can lead to catastrophic failure during work, risking injury or further damage to your tools and environment. Proper assessment ensures you invest your effort where it counts, maintaining safety and extending the lifespan of your gear.
As an affiliate, we earn on qualifying purchases.
Step-by-Step: Rivet Your Tool Belt Like a Pro
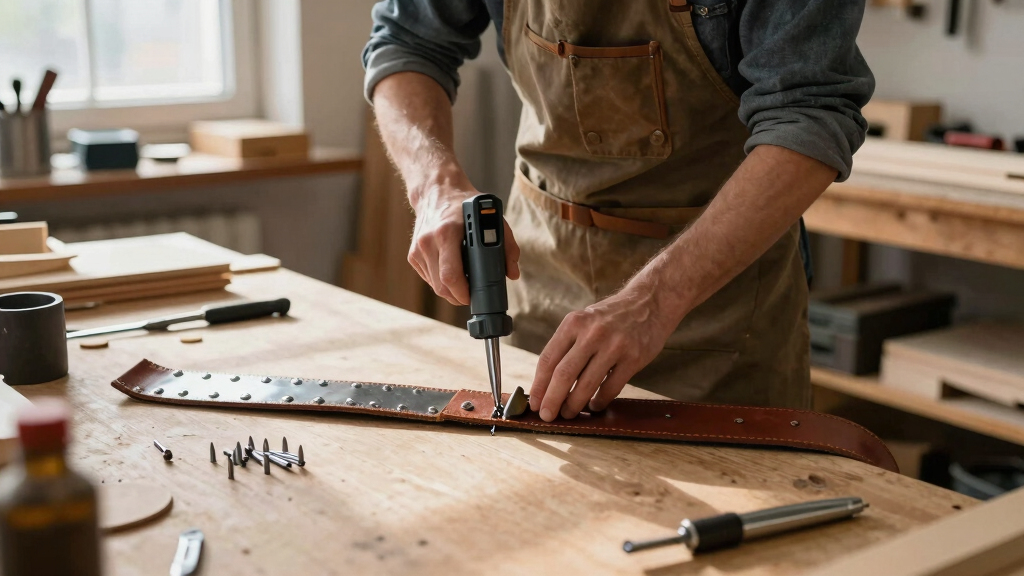
- Remove the damaged rivets using a drill or punch. Be gentle to avoid enlarging the hole or damaging the belt.
- Clean the area thoroughly with a cloth to remove dirt and debris for a tight fit.
- Choose rivets matching the original size—measure or check the old rivets for diameter and length.
- Align the rivet with the hole, making sure it sits flush against the belt material.
- Insert the rivet into the gun, then squeeze or activate the tool to crimp the rivet tightly in place.
- Check that the rivet is flush and secure. If it wiggles, redo until it’s tight.
For best results, practice on scrap material first—this saves frustration on your actual repair.
Proper technique ensures that the rivet is installed correctly, providing maximum holding strength. Squeezing the rivet uniformly prevents weak spots that could lead to failure. Additionally, ensuring the rivet is flush avoids snagging or discomfort during use, and helps maintain the belt’s appearance and integrity over time.
As an affiliate, we earn on qualifying purchases.
Safety First — Protect Yourself While Riving
Always wear safety glasses. Riveting involves force and small metal parts that can fly or cause injury. Work in a well-lit, ventilated area. Keep your hands steady and your workspace free of clutter.
If you’re using power tools, follow all safety instructions. Remember, a firm grip and proper posture prevent accidents—your body is your best safety gear.
Understanding and respecting safety precautions minimizes the risk of injury and ensures a smooth repair process. Proper safety measures not only protect you during the repair but also extend the lifespan of your tools and materials by preventing accidents that could cause damage or compromise the repair’s integrity.
As an affiliate, we earn on qualifying purchases.
Choosing Rivets: Size, Material, and Style
Choosing the right rivets is crucial. For metal belts, solid stainless steel rivets are best—they resist rust and last years. For fabric or nylon belts, plastic or nylon rivets work fine but may not hold as long under heavy use.
Size matters—measure the original rivet’s diameter and length. Too small, and it won’t hold; too big, and it won’t fit.
Here’s a quick comparison:
| Type | Material | Best For | Durability |
|---|---|---|---|
| Pop Rivets | Aluminum/Plastic | Quick fixes, fabric belts | Moderate |
| Solid Rivets | Stainless steel/Brass | Heavy-duty metal belts | High |
Choosing the appropriate size and material ensures the rivet withstands the specific stresses your belt endures. For example, a rivet that’s too small may shear under load, while an oversized rivet can cause damage or not fit properly, weakening the overall repair. Material selection impacts resistance to environmental factors; stainless steel offers superior corrosion resistance, vital for outdoor or humid conditions. Understanding these tradeoffs helps you make informed decisions that balance ease of installation, cost, and longevity.
Keep Your Repair Lasting — Tips for Durability
After riveting, double-check the tightness. Apply a light coat of rust-resistant spray if you’re in damp conditions. Periodic inspections—every few months—catch potential issues early. Tighten loose rivets before they fail during work.
If the belt shows signs of stress or wear, consider reinforcing the riveted area with extra rivets or a patch. Proper maintenance keeps your gear working hard and lasting longer.
Additionally, avoid overloading your tool belt, as excessive weight can stress the rivets and surrounding material, leading to premature failure. Regularly cleaning your belt from dirt and debris prevents corrosion and wear, maintaining the integrity of the riveted areas. Implementing these practices ensures your repair remains secure, functional, and safe over time, ultimately extending the life of your tool belt and saving you money on replacements.
Frequently Asked Questions
Can I rivet my tool belt myself or do I need a professional?
Most rivet repairs are straightforward and DIY-friendly if you have the right tools. Just follow the steps carefully, and you’ll save money and get a solid fix.What’s the best rivet gun for this kind of repair?
A manual rivet gun works well for occasional repairs and smaller jobs. For more frequent or thicker material repairs, a pneumatic rivet gun offers better power and speed.How do I remove old, damaged rivets without damaging the belt?
Use a drill with a small bit or a punch to carefully extract the rivet. Take your time to avoid enlarging the hole or tearing the belt material.How long will a rivet repair last?
When done correctly with the right materials, rivet repairs can last for several years—especially if you inspect and tighten rivets periodically.Are there alternatives to riveting for fixing a tool belt?
Yes. Sewing works for fabric belts, welding for metal belts, or using bolts and nuts for certain repairs. Riveting remains the most durable and fastest method for most situations.Conclusion
A rivet repair is a quick, reliable fix that can add years to your tool belt. With the right tools, materials, and technique, you can keep your gear in top shape—saving money and avoiding downtime. Remember, a small investment in maintenance pays off in durability and safety every day you wear your belt.Halloween Picks
halloween
As an affiliate, we earn on qualifying purchases.