
TL;DR
Most torn tool bag handles are repairable with heavy-duty thread, patches, and proper stitching patterns. Restitching and reinforcing can restore strength, but check fabric condition first. A DIY fix can save you money, but know when to replace or claim warranty.
Identify if the tear is stitching, webbing, fabric, or hardware failure before fixing.
Use bonded nylon or polyester thread (size V-69 or V-92) and a box-X stitch pattern for best load strength.
Reinforce patches with rivets or backing plates to spread the load and prevent future tearing.
Test the handle gradually with heavier loads after repair to ensure safety.
Warranties may be voided by DIY repairs; consider replacement if damage is extensive.
How to Repair a Torn Tool Bag Handle
A torn handle rarely means the end of a trusted tool bag. Diagnose the failure, rebuild the load path with proper materials, stitch for strength, reinforce the anchor, and test the repair before the next jobsite haul.
Find the actual failure point
Handle problems look similar from a distance, but each needs a different fix. Pull the attachment area flat, inspect both sides, and identify the weakest material before choosing a repair.
Torn stitching
The webbing remains intact, but the factory thread has pulled out around the anchor.
Fix: clean holes + restitchTorn webbing
The nylon, canvas, or leather handle is split, cut, or badly frayed.
Fix: overlap patch + box-XTorn bag body
The handle has pulled through the surrounding fabric, leaving a weak attachment zone.
Fix: backing patch + rivetsBroken hardware
A D-ring, grip, buckle, clip, or existing rivet is cracked, bent, or missing.
Fix: replace rated hardwareMaterials that survive tool loads
Match or exceed the original construction. Ordinary sewing thread and glue-only patches may look tidy, but repeated lifting and abrasion will expose the weakness quickly.
| Component | Avoid | Preferred choice | Why it works |
|---|---|---|---|
| Thread | ✗ All-purpose thread | ✓ V-69 / V-92 bonded nylon | Abrasion resistant and designed for heavy seams |
| Needle | ✗ Fine household needle | ✓ Upholstery or leather needle | Penetrates webbing and stacked fabric layers |
| Hand tool | ~ Light home machine | ✓ Sewing awl / walking foot | Controls thick materials such as 1680D nylon |
| Patch | ✗ Thin decorative fabric | ✓ Webbing, leather, Cordura | Restores structure and extends the load path |
| Reinforcement | ~ Stitching alone | ✓ Rivets or backing plate | Spreads force beyond the damaged fibers |
| Adhesive | ✗ Glue as sole support | ✓ Contact cement supplement | Holds the patch while stitching; does not carry the load alone |
Rebuild the load path
The objective is not merely to close the tear. A lasting repair transfers lifting force through sound material around the damaged area.
Clean
Trim loose fibers, remove dirt and oil, then let the area dry completely.
Patch
Cut webbing or leather larger than the tear so it overlaps sound material.
Position
Use contact cement sparingly to stabilize layers before stitching.
Stitch
Sew the perimeter and diagonals with a saddle stitch or box-X pattern.
Reinforce
Add a second stitch line, backing plate, or properly set metal rivets.
Why the box-X holds
The perimeter resists peeling while crossed diagonals spread tension across a wider patch area.
Consistent spacing · firm tension · secure endsLoad-test in stages
For a bag normally carrying 50 lb, begin at 25 lb, inspect the repair, then work upward.
Know when the bag is no longer safe
Repair makes sense
- The surrounding bag fabric is firm and abrasion-resistant.
- The damage is limited to stitching or a small webbing tear.
- A patch can overlap healthy material on every side.
- Load-rated replacement hardware is available.
- The finished handle passes a gradual weight test.
Replace or claim
- The attachment fabric is shredded, brittle, rotten, or degraded.
- Multiple seams and structural areas are failing at once.
- The frame, D-ring, or load-bearing hardware is cracked or bent.
- There is no sound material available for a secure backing patch.
- A DIY repair would void useful manufacturer coverage.
Review the warranty before opening old seams. Brands including Veto Pro Pac, Klein Tools, Milwaukee, and DeWalt may offer multi-year or limited coverage, replacement parts, or formal repair options.
Every strong repair follows the same logic
Tool bag handle repair FAQ
Can I fix the handle myself?
Usually, yes. Stitching failures and localized tears respond well to heavy thread, an overlapping patch, and reinforcement. Replace the bag if the surrounding structure is extensively damaged.
What thread is strong enough?
Use bonded nylon or bonded polyester upholstery thread in V-69 or V-92. Waxed heavy thread can also work for hand stitching. Avoid ordinary all-purpose thread.
Do I need a special machine?
No. A sewing awl with a heavy upholstery or leather needle can handle many repairs. For machine work, a walking-foot or upholstery machine is better suited to thick webbing layers.
Diagnose the Tear — Find Out What’s Really Wrong
The first step? Pinpoint the type of damage. Is it just the stitching coming apart, or has the webbing ripped? Maybe the fabric around the attachment point has frayed, or the hardware broke. Knowing this shapes your fix.
For example, if the stitching has pulled free but the webbing is intact, a simple re-stitch with heavy thread might do the trick. But if the webbing is torn, you’ll need patches or reinforcement. Ripped fabric around the handle’s attachment point? That calls for a patch and some extra stitching or rivets.
This quick diagnosis saves you time and money, and prevents wasting effort on a repair that won’t hold.
heavy-duty nylon thread for sewing fabric
As an affiliate, we earn on qualifying purchases.
As an affiliate, we earn on qualifying purchases.
Choose the Right Materials for a Strong, Lasting Fix
Handling a torn tool bag handle means using materials that match or exceed the original strength. Bonded nylon or polyester thread (V-69 or V-92 size) is your best bet. Ordinary sewing thread? It’ll fail under heavy loads.
For patches, select durable nylon webbing, leather, or heavy-duty fabric. Metal rivets or Chicago-style snaps spread load and prevent further tearing. A strong adhesive, like contact cement, can help reinforce patches, but never rely on glue alone for load-bearing repairs.
Using high-quality materials is crucial because they determine how well your repair will hold over time. Cheap thread or flimsy patches might seem sufficient initially but can fail quickly under the repeated stress of carrying tools. The tradeoff is often between cost and durability; investing in the right materials ensures your repair isn’t only quick but also reliable, saving you money and frustration in the long run.
As an affiliate, we earn on qualifying purchases.
Step-by-Step: How to Sew and Reinforce Your Handle
- Gather your materials: heavy-duty thread, needle or sewing awl, patches, rivets, and optionally, contact cement.
- Clean the area. Remove loose fibers, dirt, and oil. Dry thoroughly.
- If the webbing is torn, cut a patch of matching webbing or leather slightly larger than the tear. Apply contact cement to both surfaces and let it set.
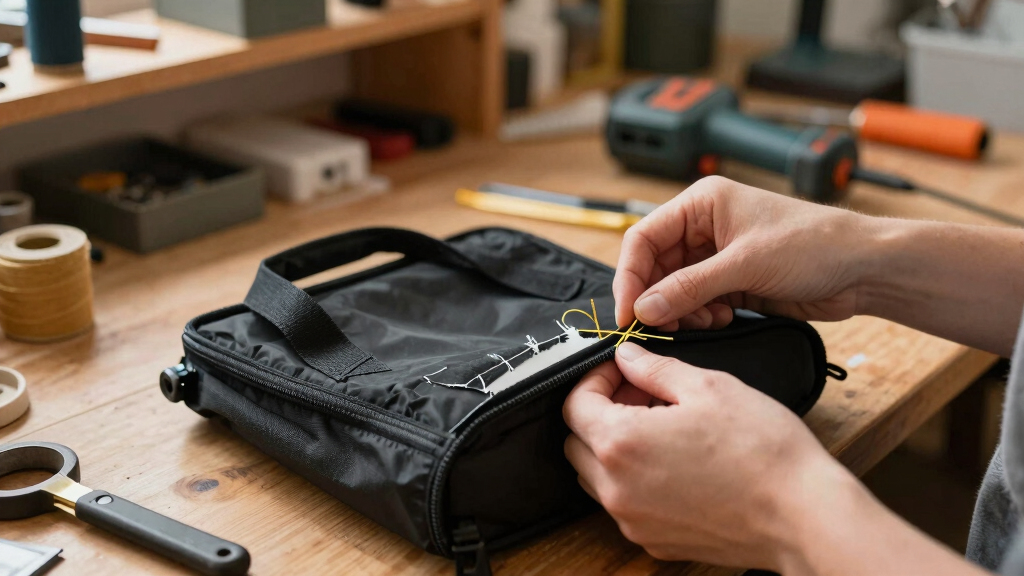
- Position the patch over the tear, then sew around the edges using a box-X pattern with bonded nylon thread. Use a leather or upholstery needle for thick materials.
- For extra strength, sew a second line of stitches parallel to the first, or add rivets along the patch’s edges.
- Finish by melting synthetic thread ends or burying knots. Test the repair by gradually adding weight before full load.
For example, a handyman fixed a torn webbing handle on his Klein bag by patching with nylon webbing and sewing with a heavy upholstery needle. It’s now been through two seasons of daily use.
Note that the quality of your stitches directly impacts the repair’s longevity. Proper tension, consistent stitch spacing, and secure knotting prevent unraveling under load. Using the right needle and thread combination ensures you penetrate tough webbing or fabric without damaging your materials, which is vital for a durable repair that can withstand the rigors of daily use.
As an affiliate, we earn on qualifying purchases.
Reinforce the Repair — Make It Last Longer
A simple stitch alone might not hold forever. Reinforce your handle with additional rivets or a backing plate. This spreads the load and prevents future tearing.
For instance, rivets can be placed along the handle’s attachment points, especially if the fabric or webbing is frayed. Use a rivet setter and a hammer for a clean, tight fit. If you prefer, use a heavy-duty metal plate behind the fabric and rivet through both layers.
Imagine a carpenter attaching a new handle to his favorite bag, with extra rivets and webbing patches. Now, it’s ready to carry heavy tools again, no sweat. Reinforcement techniques like these are essential because they address the root causes of tearing—overload, stress points, or material fatigue—and help distribute forces more evenly, significantly extending the life of your repair.
As an affiliate, we earn on qualifying purchases.
Test the Repair — Make Sure It’s Safe for Heavy Loads
Don’t just assume your fix is good. Carefully test it by lifting gradually heavier weight. Start with half your usual load, then increase. Watch for thread pulling or fabric puckering.
For example, if you usually carry 50 pounds of tools, test with 25, then 40. If everything holds, the handle is ready for full use.
This step is critical because it verifies the integrity of your repair under real-world conditions. A repair that looks perfect but fails under load can cause injury or damage your tools. Gradually increasing weight allows you to identify weak points before they become catastrophic failures, saving you time and money in the long run.
When to Say ‘Time to Replace’ Instead of Repair
If the fabric or webbing is shredded, or the hardware is cracked or bent, a repair might be temporary. Remember, a weak spot can become a new failure point.
Check your manufacturer’s warranty. Some brands, like Veto Pro Pac or Klein, offer multi-year coverage. If your bag is under warranty, a repair might void it — so weigh the options.
Sometimes, investing in a new bag makes more sense if the damage is widespread or the material is degrading. Recognizing when a repair is no longer cost-effective or safe is crucial. Continuing to patch a severely compromised bag can lead to sudden failure, risking injury or damage to your tools. The tradeoff involves weighing repair costs against the benefits of a new, more durable bag that can better withstand your workload.
Frequently Asked Questions
Can I fix a torn handle myself, or should I just buy a new bag?
In most cases, a torn handle can be repaired with heavy-duty thread, patches, and reinforcement. However, if the fabric or hardware is badly damaged, replacing the bag might be more reliable. Consider your skill level and the extent of damage.What kind of thread is strong enough for a tool bag handle?
Bonded nylon or polyester thread in size V-69 or V-92 is recommended. These threads are designed for heavy loads and abrasion resistance, ensuring your repair holds up under daily use.How do I sew through material this thick — do I need a special machine or needle?
A heavy-duty upholstery or leather needle paired with a sewing awl or a commercial sewing machine with a walking foot is ideal. Standard home machines often can’t handle thick webbing or multiple layers without modification.Will fabric glue, super glue, or repair tape work instead of sewing?
No. While adhesives can reinforce patches temporarily, they don’t provide the load-bearing strength needed for handles. Sewing with heavy thread and proper stitching is essential for safety and durability.How can I prevent the handle from tearing again?
Avoid overloading your bag, regularly inspect stitches, and reinforce weak points early. Adding rivets or extra webbing patches at stress points also prolongs handle life.Conclusion
A torn tool bag handle isn’t the end — it’s a chance to get creative and practical. With the right materials, a steady hand, and patience, you can give your gear a second life. Think of it as a small act of sustainability that keeps your tools ready for the next job.Every repair is a reminder: durable gear isn’t just bought — it’s made to last. So next time your handle tears, grab your needle and patch, and fix it. Your tools and your wallet will thank you.