TL;DR

Get business pricing on tools and workshop supplies
- Business-only prices and quantity discounts
- Tax-exempt purchasing
- Multiple users, one account, clear invoices
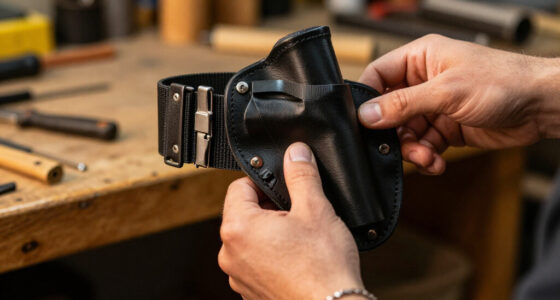
Sizing an EDC belt correctly means measuring your waist at the belt line while wearing your usual gear and clothing. Unlike fashion belts, carry belts require a snug fit to prevent shifting, so always check the manufacturer’s specific size chart rather than assuming your pants size plus two inches.
You’ve just dropped your wallet because your belt slid down. Or worse, your holster shifted while you were reaching for a tool, throwing off your grip. This isn’t a gear failure. It’s a sizing failure.
How to size an EDC belt for carry is more complex than buying a dress belt. Your pants size is a rough estimate at best. Belt manufacturers use wildly different definitions for “size,” and your gear adds bulk that changes your effective waistline. A belt that fits your trousers perfectly might be too loose to hold a heavy holster steady.
This guide cuts through the confusion. We’ll walk you through measuring correctly, accounting for holster bulk, and choosing the right adjustment range. You’ll learn why the old “add two inches” rule is often wrong and how to ensure your belt supports your load without cutting off circulation.
Ignore your pants size; measure your waist at the belt line with your gear and usual clothing on.
Always consult the specific manufacturer’s size chart, as ‘size’ definitions vary by brand.
Add 1-2 inches to your measurement for IWB holsters to account for internal bulk.
Prioritize belt stiffness and width (1.5" is standard) to prevent gear sag and shifting.
Test the fit by sitting, standing, and bending to ensure comfort and stability under movement.
Why Your Pants Size Is a Liar
Your pants size is a marketing number, not a measurement. A 34-inch pant waist might actually measure 36 inches on you, depending on the brand, cut, and fabric stretch. When you buy a belt based on this number, you’re starting with bad data. This discrepancy arises because apparel sizing is driven by vanity sizing and fit preferences rather than strict geometric standards. A “34” in one brand is a snug fit; in another, it’s a relaxed fit. Using this inconsistent variable as your primary input for a functional tool like a carry belt introduces immediate error into your equation.
How to size an EDC belt for carry starts by ignoring your pant tag. Instead, you need to measure the actual circumference of your waist where the belt sits. This is usually at the natural waist or slightly lower, depending on your trousers. If you wear low-rise work pants, your belt line is lower than your natural waist. The implication here is critical: the belt must fit the anatomy, not the garment. If your belt is sized to the garment, it will inevitably be too loose at the body, causing the belt to rotate or slide as you move.
Consider the difference between a dress pant and a heavy-duty work pant. A dress pant might have a thin waistband and sit high. A work pant has a thick, reinforced waistband and often sits lower on the hips. The same “34” in both pairs will fit differently. Relying on the label guarantees a mismatch. The tradeoff is clear: trusting the label saves you thirty seconds but costs you hours of discomfort and potential gear failure. A belt that is too loose creates a lever arm for your holster, amplifying sway. A belt that is too tight, based on a small pant size, restricts blood flow and causes pain during seated tasks.
Furthermore, belt brands define “size” differently. One brand might list the total length from buckle to tail. Another might list the distance from the buckle to the middle hole. A third might list your actual body measurement. Without checking the specific chart, you are gambling on fit. This lack of standardization means that a “size 34” from Brand A could be physically different from a “size 34” from Brand B. Understanding this variability is the first step toward precision. You are not buying a number; you are buying a physical dimension. Always verify what that number represents before purchasing.
Products Worth Considering

Greenworks 40V 8-Inch Cordless Pole Saw with 2.0 Ah Battery and Charger

Bosch GTS15-10 10-Inch Portable Jobsite Table Saw with Gravity-Rise Wheeled Stand

EGO POWER+ HT2600 26-Inch Cordless Hedge Trimmer (Battery and Charger Not Included)
As an affiliate, we earn on qualifying purchases.
The Only Accurate Way to Measure Your Waist
To get the right size, you must measure your body at the belt line, not your natural waist. Grab a flexible tape measure. Stand in front of a mirror. Wear the trousers and underwear you plan to wear with this belt. If you carry inside the waistband (IWB), put on your holster and dummy weight or training replica. This step is non-negotiable for accuracy. The reason is simple: gear changes the geometry of your waist. An empty waistband is a different shape than a waistband containing a polymer holster and a steel firearm. If you measure the empty waist, your belt will be too tight when loaded, or you will be forced to loosen it so much that it loses its stabilizing function.
Wrap the tape measure around your waist at the point where the belt will sit. Keep it snug but not tight. You want to measure your body, not compress it. Note the measurement in inches. If you don’t have a tape measure, use a piece of string and measure it against a ruler later. The key nuance here is “snug but not tight.” If you pull too hard, you compress soft tissue, resulting in a measurement that is artificially small. When you wear the belt, the fabric and gear will prevent that compression, leading to a belt that is uncomfortably tight. Conversely, if the tape is loose, you’ll get a measurement that results in a belt that slides. The goal is the resting state of your waist with gear.
Here is a quick checklist for accurate measurement:
- Wear your usual gear: Include your wallet, phone, and keys if they go in your pockets, as they add bulk. Ignoring pocket contents leads to a belt that is too tight at the front, causing the buckle to tilt or dig in.
- Stand naturally: Don’t suck in your gut. Relax your stomach. Most people unconsciously tighten their core when being measured. This creates a false baseline. You need the belt to fit your relaxed state, as that is how you will spend the majority of your day.
- Measure at the belt line: This is where the belt actually sits, which may be below your navel. Measuring at the natural waist (above the navel) is a common error. Your belt sits on your hips or lower abdomen. Measuring higher yields a smaller number, resulting in a belt that is too short.
- Include holster bulk: If carrying IWB, measure with the holster in place to account for the extra thickness. The holster pushes the belt outward, increasing the circumference required to close the buckle. Without this, the belt will be too short to fasten securely.
This measurement is your body circumference. It is the single most important number for sizing. Do not add inches yet. Do not round up. Just get the raw number. This raw number is your baseline truth. Any adjustments for belt length or brand sizing should be applied to this number, not to a guess. By isolating this variable, you remove the noise of clothing brands and focus on the physical reality of your body plus gear.
Decoding Manufacturer Size Charts
Once you have your body measurement, you must translate it into the brand’s sizing system. This is where most people mess up. There is no industry standard. One brand’s “34” might mean a 34-inch body measurement. Another’s “34” might mean a 36-inch belt length. This ambiguity is not just an inconvenience; it is a safety issue. A belt that is too short cannot be fastened, leaving you without a primary retention device. A belt that is too long creates excess tail that can snag on gear, get caught in vehicle pedals, or flap around, compromising stealth and professionalism.
Look for the size chart on the product page. It will usually list “Waist Size” or “Belt Length.” If it says “Waist Size,” it likely refers to your body measurement. If it says “Belt Length,” it refers to the physical length of the strap. You need to find the column that matches your body measurement. The implication of misreading this chart is significant. If you assume “Size 34” means your body is 34 inches, but the brand means the belt is 34 inches long, you might receive a belt that is several inches too short for your waist. Always verify the definition of the size variable. If the chart is ambiguous, contact customer support. Do not guess.
For example, if your body measurement is 34 inches, and the chart says “Size 34 fits 32-35 inch waist,” you buy size 34. If the chart says “Size 34 fits 36-39 inch waist,” you need a size 32. Always cross-reference your measured body circumference with the chart’s recommended range. This process highlights the tradeoff between brand consistency and individual fit. You are adapting your precise measurement to the brand’s generalized categories. The closer your measurement is to the middle of the recommended range, the better the fit will be across different clothing thicknesses.
Pay attention to the adjustment range. A belt with holes spaced one inch apart offers less flexibility than a ratcheting belt. If you are between sizes, choose the size that allows you to use the middle holes. This gives you room to tighten or loosen as your weight fluctuates or clothing thickness changes. The strategic choice here is long-term usability. A belt that fits perfectly today but has no room for adjustment will become useless if you gain five pounds or wear a thicker shirt in winter. Choosing a size that centers your current measurement within the adjustment range ensures the belt remains viable for years, not just weeks. It also allows for micro-adjustments throughout the day, such as loosening slightly after a meal.
IWB vs. OWB: How Holster Type Changes Fit
The type of holster you use dictates how much room you need. Inside-the-waistband (IWB) holsters take up space inside your pants. This pushes your belt outward, effectively increasing your waist circumference. If you measure without the holster, your belt will be too tight when you carry. The physics here are straightforward: the holster occupies volume that was previously empty. To accommodate this, the belt must be longer. However, simply adding length is not enough; the belt must also be stiff enough to resist the leverage created by the holster pushing against the belt from the inside. A soft belt will simply collapse or fold over, rendering the holster inaccessible.
Outside-the-waistband (OWB) holsters sit on top of the belt. They don’t add internal bulk, but they add weight and leverage. A stiff, wide belt is often better for OWB to prevent sagging. However, the sizing is more about the belt’s stiffness than its length. The implication is that for OWB, you can often use a belt sized closer to your bare waist measurement, provided it is rigid. If the belt is too long, the excess tail can be tucked in, but if the belt is too soft, the holster will sag regardless of length. The tradeoff here is between comfort and stability. A very stiff belt may feel rigid against the body, but it is necessary to support the cant and angle of an OWB holster.
Here’s a comparison of sizing considerations:
| Carry Type | Measurement Adjustment | Belt Width/Style | Fit Priority |
|---|---|---|---|
| IWB | Add 1-2 inches for holster bulk | 1.5″ – 1.75″ width, stiff | Snugness to prevent shifting |
| OWB | Measure body only | 1.5″ – 2″ width, very stiff | Stability to support weight |
| No Holster | Measure body only | 1.25″ – 1.5″ width, flexible | Comfort for daily wear |
For IWB, the goal is a secure fit that doesn’t dig in. For OWB, the goal is a stable platform that doesn’t bend. A belt that is too loose for OWB will sag, making the holster hard to draw from. A belt that is too tight for IWB will be uncomfortable and may cut off circulation. The critical distinction is that IWB fit is primarily about circumference management (handling the added bulk), while OWB fit is primarily about structural integrity (handling the leverage). Ignoring this distinction leads to buying the wrong type of belt for the job. A belt optimized for one carry style will often fail in the other.
Why Stiffness and Width Matter More Than Length
You can adjust length with a buckle. You can’t adjust stiffness. A soft, flexible belt will collapse under the weight of a heavy holster, causing your gear to sag and shift. This is dangerous and annoying. For tactical and duty belts, rigidity is key. The reason stiffness outweighs length is that length is a linear dimension easily corrected by holes or ratchets, while stiffness is a material property. If a belt lacks rigidity, no amount of tightening will prevent the holster from tilting or the belt from folding. This creates a failure point in your carry system. A belt that folds over hides your weapon or tool, making it inaccessible in an emergency. Therefore, when sizing, you must also evaluate the material’s load-bearing capacity relative to your specific gear.
Look for belts with a stiff core. This might be a polymer insert, layered leather, or reinforced nylon. A good test: hold the belt up by one end. If it flops over like a wet noodle, it’s not suitable for carrying heavy gear. It should hold its shape somewhat. This simple test reveals the belt’s resistance to bending. A belt that holds its shape indicates a high modulus of elasticity, meaning it resists deformation under load. The tradeoff is comfort. Very stiff belts can feel harsh against the body, especially when sitting. However, this discomfort is the price of security. A flexible belt offers comfort but sacrifices access and safety. You must weigh these factors based on your risk profile and gear weight.
Width also plays a role. A 1.5-inch width is the sweet spot for most EDC belts. It fits through standard belt loops and provides enough surface area to distribute weight. Wider belts (1.75″ or 2″) are better for heavy loads but may not fit through all trouser loops. Narrower belts (1.25″) are comfortable for light carry but lack support. The implication of width choice is logistical and functional. A 2-inch belt may prevent you from wearing your favorite jeans, limiting your wardrobe options. A 1.25-inch belt may dig into your hips under heavy loads, causing pain and bruising. The 1.5-inch standard represents a balance between compatibility with clothing and functional support for moderate loads.
Consider the material. Full-grain leather stiffens over time but can be stiff initially. Nylon webbing is durable but often needs a stiffener insert to work for carry. Hybrid belts combine both for balance. Choose based on your load. If you carry a heavy flashlight and multi-tool, go stiffer. If you carry only a phone and keys, flexibility is fine. The material choice dictates the belt’s lifecycle. Leather requires maintenance but offers a classic aesthetic and increasing comfort. Nylon is maintenance-free but may lack the rigid support needed for firearms without inserts. Understanding these material properties allows you to select a belt that matches not just your waist size, but your lifestyle and gear requirements.
Testing the Fit: The Sit, Stand, and Bend Test
Once you have the belt, don’t just wear it around the house. Test it under real conditions. Put on your trousers, holster, and gear. Fasten the belt at the hole you expect to use most often. This is the final validation step. Static measurement is theoretical; dynamic testing is practical. A belt that measures correctly may still fail in motion if the buckle design, hole placement, or material stretch does not account for body movement. Skipping this test risks discovering fit issues in a high-stakes situation.
First, stand up straight. The belt should feel secure but not constricting. You should be able to slide two fingers between the belt and your body. If you can’t, it’s too tight. If you can slide a hand, it’s too loose. The two-finger rule is a heuristic for optimal tension. It ensures enough pressure to prevent rotation without restricting blood flow or breathing. If you can slide a hand, the belt lacks the friction and tension needed to hold a holster in place during rapid movement. The implication of a loose belt is gear displacement. The implication of a tight belt is physiological distress. Finding the middle ground is essential.
Next, sit down. This is crucial. When you sit, your stomach expands. A belt that feels fine standing might cut off your breathing when seated. Adjust the hole if necessary. You should be comfortable sitting for extended periods without needing to loosen the belt. Many people spend more time sitting than standing. A belt that fails the sit test is a belt you will constantly adjust, distracting you from your tasks. The tradeoff here is between standing security and sitting comfort. If you must choose, prioritize the ability to sit comfortably, as you can always tighten a belt for specific activities, but you cannot easily loosen a belt that is already at its maximum tightness without losing security.
Finally, bend and twist. Simulate reaching for a tool or drawing your holster. The belt should not shift significantly. If the buckle slides to the side or the holster moves, the belt is too loose. If it pinches or restricts movement, it’s too tight. A good EDC belt stays put without causing discomfort. This dynamic test reveals the belt’s performance under lateral force. Twisting generates torque that a loose belt cannot resist. Pinching indicates that the belt is too narrow or too tight for your anatomy. The goal is a belt that acts as a stable platform, not a constraint. If the belt shifts, your aim and access are compromised. If it pinches, your endurance is compromised. Both are failures of sizing.
Frequently Asked Questions
Should I buy my pants size or go up a size?
Neither rule is universal. Pants sizing is inconsistent across brands, and belt manufacturers define sizes differently. Always measure your waist at the belt line and consult the specific product’s size chart.How do I measure for an IWB belt?
Measure your waist at the belt line while wearing your trousers and underwear. If possible, include your IWB holster in the measurement to account for the extra bulk it adds inside the waistband.Does an OWB holster require a different belt size?
Not necessarily a different length, but it often requires a stiffer belt. Measure your body waist only, as OWB holsters sit outside the waistband. Ensure the belt is wide and rigid enough to support the holster’s weight.How tight should a carry belt be?
It should be secure enough to prevent gear from shifting but comfortable enough to sit and bend without pain. You should be able to fit two fingers between the belt and your body when standing.What if I’m between sizes?
Choose the size that allows you to use the middle holes in the adjustment range. This provides room for weight fluctuations and clothing changes. If the chart is unclear, contact the manufacturer for guidance.Conclusion
Sizing an EDC belt is about precision, not guesswork. By measuring your actual waist with gear, checking the brand’s chart, and testing the fit in real-world scenarios, you eliminate the frustration of slipping belts and shifting holsters.
Don’t let a bad fit compromise your carry. Take the ten minutes to measure correctly. Your back, your comfort, and your access to gear will thank you. Next time you’re shopping for a belt, skip the pants-size shortcut and grab the tape measure.