TL;DR

Get business pricing on tools and workshop supplies
- Business-only prices and quantity discounts
- Tax-exempt purchasing
- Multiple users, one account, clear invoices
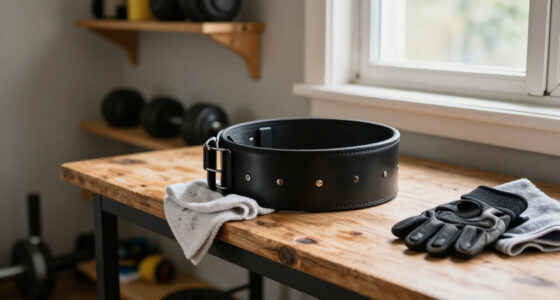
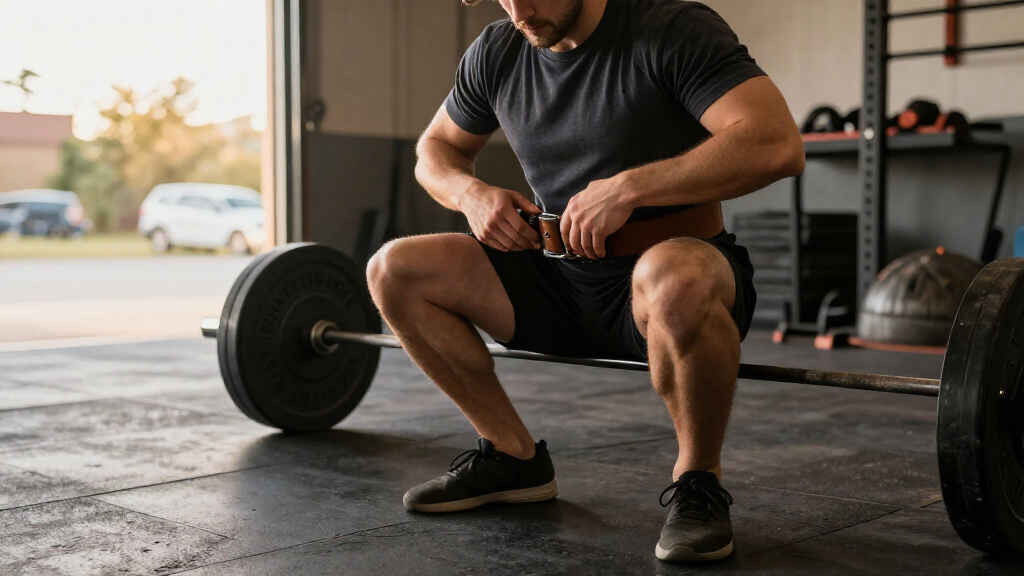
Start with your lifting belt around your navel, then shift it slightly up or down until it stays clear of your ribs and hip bones through your full squat. Fasten it snugly enough to brace against while still allowing a full breath and abdominal expansion. A belt can support bracing during challenging sets, but it does not replace good technique or prevent injury.
A squat belt can feel perfect standing up and bite into your hips the moment you reach depth. That small change can turn a steady rep into a fight with your gear. The fix usually isn’t to crank the belt tighter; it’s to find a position that lets your torso move and brace.
This guide shows you how to position a lifting belt for squats, how snug to fasten it, and how to test the fit before heavy work. You’ll get practical checks for rib and hip clearance, a simple bracing sequence, and realistic advice on what a belt can—and cannot—do. Think of it as setting a tool belt before a long shift: it should stay put and help the job, not dig into you every time you move.
There is no single placement that works for every lifter. Your best fit depends on torso length, belt width, and squat style. Start with a sensible position, then let a few controlled reps tell you what needs adjusting.
Start with the belt around your navel, then shift it slightly until it clears your ribs and hips at full squat depth.
Fasten the belt snugly, but keep enough room to inhale and expand your abdomen and sides against it.
Test the position with bodyweight squats and light loads before relying on it for heavy work.
Brace into the belt; do not treat it as a back brace or a guarantee against injury.
A belt can be optional for lighter sets, and different squat styles may call for small fit adjustments.
What a squat belt can—and cannot—do for your brace
A lifting belt gives you a firm surface to brace your trunk against; it does not hold your spine in position for you. You still need to control your squat, choose a manageable load, and create your own brace. A belt can give you something firm to push into, much like pressing your palm against a wall to steady yourself—but the wall doesn’t do the work for you.
When you inhale and tighten your trunk, you can expand your abdomen and sides against the belt. That pressure may help some lifters perform challenging sets, but it does not make every rep safer or stronger by default. Research on belts varies by exercise, lifter, and outcome, so performance findings should not be turned into a promise that a belt prevents back injuries.
For example, if you’re learning to squat with an empty bar, adding a belt may distract you from practicing a steady descent and comfortable depth. If you’re an experienced lifter preparing for a hard set of five, the belt may give you a useful surface to brace against. The tool is optional; the skill is still yours.
- Use it as a bracing aid, not a substitute for technique.
- Keep lighter practice in the plan if you want to rehearse unbelted bracing.
- Build load gradually rather than relying on equipment to offset a jump that feels too heavy.
A belt can support a brace; it cannot brace for you.
If wearing a belt causes pain or you have a medical concern, stop and ask a qualified coach or health professional for guidance. For ordinary training, begin with a light set and learn how the belt feels before trusting it under a demanding load.
Products Worth Considering

Greenworks 40V 12-Inch Cordless Chainsaw with 2.0Ah Battery and Charger

EGO POWER+ HT2600 26-Inch Cordless Hedge Trimmer (Battery and Charger Not Included)

Greenworks 40V 8-Inch Cordless Pole Saw with 2.0 Ah Battery and Charger
As an affiliate, we earn on qualifying purchases.
How to find a belt position that stays comfortable at depth
- Start around your navel. Place the belt around your torso, not automatically at the narrowest point of your waist.
- Check rib and hip clearance. Stand naturally and make sure the belt does not press painfully against either area.
- Do three to five slow bodyweight squats. Reach the depth you normally use and notice any pinch, restriction, or belt movement.
- Shift it a little and retest. Move the belt slightly up or down, then repeat the same squat.
- Keep the position that lets you breathe, brace, and move normally.
How to position a lifting belt for squats comes down to this moving fit check, not a magic line on your abdomen. Around the navel is a useful starting point, but slightly above or below can work just as well. Your torso and hip shape matter more than a rigid rule.
Try the check with a slow descent, a brief pause at the bottom, and a smooth stand. If the belt catches your lower ribs on the way down, move it a little lower. If it presses into your hip bones or thighs at depth, try a little higher. These small adjustments can feel like moving a tool pouch away from the spot where it hits your leg with every step.
For instance, a lifter with a short torso may find a wide belt crowds both ribs and hips, while someone with more space between them can wear it comfortably near the navel. Don’t force the same placement on both bodies. The best position is the one that stays comfortable through your normal range of motion.
How tight to fasten the belt so you can still brace
Fasten your belt snugly enough to feel it around your trunk, but not so tightly that you cannot take a full breath and expand against it. The belt should feel like a steady boundary, not a clamp. You need room to inhale and create pressure; tightening it as far as possible can work against the very brace you want.
Here’s a quick check: fasten the belt, breathe in through your nose or mouth, and try to expand your abdomen and sides into it. If your breath stops short, your trunk cannot expand, or you feel pain, loosen it one notch or adjust its position. You should be able to stand and set yourself without fighting the fastening.
Imagine you’re getting ready for a controlled set of three. You fasten the belt, take one full breath, and brace. If you can feel the belt meet your abdominal wall while your breath stays smooth, you’re close. If you have to suck in your stomach or strain just to close the belt, it is too tight for useful bracing.
Different fastening styles—prong, lever, and quick-release designs—change how you adjust the belt, but none dictates one ideal tightness. A quick-release can be handy between sets; a prong belt may offer more adjustment points. Choose a setting that stays secure while still letting you breathe, brace, and reset between reps. A belt should not cause pain, numbness, or a change in your squat just because it is fastened.
How to brace against the belt before each squat rep
- Set your feet and posture. Take your usual stance before you focus on the belt.
- Inhale and expand your trunk. Send the breath into your abdomen and sides; where you can, create expansion around your back as well.
- Tighten your midsection. Brace as if preparing for a firm, controlled impact, not as if you’re trying to pull your stomach inward.
- Press gently into the belt in all directions. Feel the belt around your trunk rather than pushing only your belly forward.
- Keep the brace through the hardest part. Stand, then reset your breath between repetitions when needed.
How to position a lifting belt for squats matters because the belt only helps if you can brace into it. A position that blocks your inhale or pinches at the bottom makes the brace harder to use. A comfortable belt gives your trunk something firm to meet as you create pressure.
On a light warm-up set, take a breath before each rep and notice whether your abdomen and sides press into the belt. Keep your shoulders relaxed and your movement familiar. If you feel the belt only at the front, try expanding around your sides too; if you cannot feel it at all, check the fit and your breathing rather than immediately tightening it to the limit.
For a set of five, you might brace before the first rep, hold that trunk tension through the descent and the drive up, then reset your breath at the top. The exact breathing rhythm can vary by lifter and set. The useful rule is brace before you descend and keep control through the hardest portion. Practice this with lighter weight before using it on near-maximal attempts.
How to adjust the belt for high-bar, low-bar, and front squats
Use a belt position that lets you keep your normal stance and reach your usual depth for the squat variation you’re doing. High-bar, low-bar, and front squats can change how your torso and hips move, so the same belt height may feel different between lifts. Test the fit for each style instead of assuming one placement suits every squat.
In a high-bar squat, you may prefer a position that stays clear of the ribs as your torso lowers. In a low-bar squat, a small shift may give your hips more room as you sit back. During a front squat, the upright torso and hand position can make a bulky or stiff belt feel more noticeable. These are starting points, not fixed rules: your own squat tells you whether the belt interferes.
For example, a lifter may wear a belt comfortably near the navel for low-bar squats, then find that exact placement presses into the hips during front squats. Moving the belt a little higher could restore room at the bottom. Make one adjustment at a time and retest with a few controlled reps; changing belt height, stance, and load all at once makes it harder to tell what helped.
Belt width and stiffness matter too. A belt that feels fine standing can become intrusive when you fold into the bottom position. If you cannot find a comfortable height, the belt’s width or fit may not suit your torso. Comfort at full depth matters more than matching another lifter’s setup.
How to test the fit before adding heavy weight
Test your belt with easy movement first, then add load only after you can squat normally, breathe fully, and brace without pain. A belt that feels comfortable in front of a mirror can still shift or pinch under movement. The fit check should happen in the squat, where the belt has to work—not just while you stand still.
- Fasten it at a manageable snugness and take a full breath.
- Perform three to five bodyweight squats through your normal depth.
- Repeat with an empty bar or light load if the first check feels good.
- Notice pinching, slipping, breath restriction, and movement changes.
- Adjust one thing at a time and repeat the test before building up.
Say you’re warming up for a work set. Your first two light sets feel smooth, but at the bottom of the third rep you notice the belt catching your hip. Don’t ignore it because the weight is still light. Shift the belt slightly, repeat a controlled rep, and keep the adjustment only if the pinch disappears without changing your depth.
This gradual check also lets you practice the unfamiliar sensation of bracing against a belt. You don’t need to wear it for every warm-up or every training set. Many lifters use it for more demanding work while keeping some lighter work unbelted. The useful choice depends on your training and goals, not a rule that says the belt must be on from the first rep.
Stop if the belt causes sharp pain or a persistent problem. If it keeps interfering even after you adjust it, get advice from a qualified strength coach or health professional rather than forcing the fit.
How to fix pinching, slipping, and other belt mistakes
If your belt pinches, slips, blocks a full breath, or changes your squat, stop and adjust before you add weight. Those signs mean the setup is not working for your body or the lift as performed. Tightening harder is not a universal fix; it can make pressure and movement restriction worse.
- Ribs feel pinched: Try moving the belt slightly lower, then retest your full squat.
- Hip bones or thighs feel crowded: Try moving it slightly higher and check depth again.
- You cannot take a full breath: Loosen the belt until you can expand your trunk into it.
- The belt shifts during reps: Recheck snugness and placement; don’t assume maximum tightness is the answer.
- Your depth or posture changes: Return to a comfortable position and retest with light weight.
A common mistake is copying a training partner’s belt height. Their torso may be longer, their belt narrower, or their squat style different. Another is treating the belt like a rigid back brace and expecting it to keep the torso in place while you lose control. Neither shortcut replaces a steady setup and controlled movement.
For example, if your belt slides up as you squat, check whether you placed it where your torso narrows sharply or whether the fit is too loose. If it still moves after a small adjustment, the belt may not match your shape or preferred squat. Persistent pain is a reason to stop using it, not a challenge to push through. A belt should support your work, not leave you dreading the next rep.
How to decide when a belt belongs in your training
Use a belt when it supports your planned work and you can wear it comfortably; you do not need it for every set. Beginners can first learn the squat and basic bracing without a belt, then try one if it fits their goals. There is no universal timetable or weight threshold that says you must start using one.
A sensible approach is to practice your movement on lighter sets without depending on the belt, then add it for selected challenging sets once you understand how to breathe and brace. For instance, you might warm up unbelted, put the belt on for a demanding work set, and take it off again for accessory work. That lets you build familiarity without turning the belt into a requirement for every squat.
A belt can give you a consistent surface to brace against during demanding lifts, but evidence about performance differs across tasks and outcomes. It is not proof of injury prevention, and it does not make an inappropriate load appropriate. If a rep becomes a grind because the weight exceeds your current capacity, a tighter belt does not change that fact.
Think of your belt as one tool in a training kit. A durable tool earns its place when it fits the job, stays comfortable, and helps you work with control. Use the belt by choice, not because you believe you cannot squat without it. If you’re unsure about technique or have a medical concern, ask a qualified coach or health professional for individual guidance.
Frequently Asked Questions
Where exactly should a lifting belt sit for squats?
Start around your navel, then adjust slightly higher or lower until the belt stays clear of your ribs and hip bones at full depth. Test the position with a few controlled squats rather than judging it only while standing.
Should the belt go above or below my belly button?
Either can work. Choose the position that lets you take a full breath, brace into the belt, and reach your normal squat depth without painful pressure.
How tight should a squat belt be?
Fasten it snugly enough to feel a firm boundary around your trunk, but loose enough to inhale and expand your abdomen and sides. If you cannot take a full breath or the belt hurts, loosen or reposition it.
Should I wear a belt during every squat set?
No. You can use a belt for selected challenging sets and practice lighter work without it. Your choice depends on your training goals, comfort, and ability to brace well with the belt on.
Does a lifting belt protect my back or prevent injury?
A belt can provide something firm to brace against and may help some lifters with demanding lifts. It does not hold your spine in place, guarantee a stronger lift, or prevent injury; good technique and appropriate loading still matter.
What should I do if the belt pinches my ribs or hips?
Stop and shift the belt slightly up or down, then retest with a controlled squat. If it continues to pinch or causes pain, stop using it and ask a qualified strength coach or health professional for advice.
Conclusion
Start around your navel, squat to your usual depth, and adjust the belt until you can breathe, brace, and move without pinching. Then practice that setup with light weight before you use it on a hard set. Your best position is the one that works through the whole rep—not the one that looks most like someone else’s.
Keep the belt as a useful tool, not a substitute for skill. When it fits well, it should feel like a steady boundary around your trunk, not a sharp edge waiting at the bottom of every squat.