
TL;DR
Listen free for 30 days with Audible
Thousands of audiobooks and originals — cancel anytime.
Start your free trialAs an affiliate, we earn on qualifying purchases.
A properly installed hammer loop makes your work faster and safer. Use sturdy materials, pick the right spot, and secure it with strong stitching or rivets. It’s an easy upgrade with big benefits.
Nothing slows you down like digging through a pocket or bag for your hammer. A simple hammer loop sewn onto your rig can make a world of difference. It keeps your tool within arm’s reach and prevents accidental drops. If you’re tired of rummaging or risking losing your hammer, this guide is for you.
We’ll walk through practical steps to add a sturdy, reliable hammer loop to your work belt or rig. Plus, I’ll cover the best materials, placement tips, and how to make it last through tough days on site. No fluff—just real, actionable advice to boost your workflow.
Choose heavy-duty materials like leather or nylon for durability.
Position the loop where it’s easy to reach without twisting or bending.
Reinforce your stitches or rivets to prevent tearing under heavy use.
Test placement with an unloaded hammer before final fixing.
Add multiple loops or pockets for other tools to maximize efficiency.
Why a Hammer Loop Is a Game-Changer for Your Workday
Ever had a hammer slip from your grip just as you’re about to swing? A dedicated hammer loop keeps your tool secure and accessible. It’s like having a trusted sidekick—ready when you need it.
Adding a loop can cut your retrieval time by nearly a third, according to some tradespeople. That means less fumbling, fewer dropped tools, and more focus on the job. It’s especially handy for carpenters, electricians, and anyone working with a lot of small tools.
Beyond convenience, a hammer loop also enhances safety by reducing the risk of dropping heavy tools from heights or during movement, which can cause injuries or damage. The tradeoff? You need to ensure the loop is securely attached and made of durable material; a poorly secured loop could become a hazard itself. Investing in quality materials and proper placement maximizes both safety and efficiency, making this a worthwhile upgrade for long-term benefits.
As an affiliate, we earn on qualifying purchases.
Choosing the Best Material for Your Hammer Loop
Durability is king here. Think thick leather, heavy-duty nylon, or rugged canvas—materials that can handle weight and wear. A leather loop ages like a fine bourbon, softening but staying tough. Nylon offers a lighter, abrasion-resistant option, perfect for daily use.
However, the choice of material impacts not just durability but also flexibility and comfort. Leather, while highly durable and aesthetically pleasing, can be stiff initially and may require breaking in. Nylon, on the other hand, is lightweight and resistant to tears, but it might not mold to your hammer’s shape as naturally as leather. Consider your work environment: if you’re exposed to moisture or rough handling, nylon or canvas might be better to prevent deterioration. Conversely, for a more polished look and natural fit, leather is ideal, especially if you’re working in carpentry or finish work where appearance matters. The tradeoff involves balancing flexibility, appearance, and longevity—choosing the material that best suits your specific needs and work conditions ensures your hammer loop will serve you reliably over time.
As an affiliate, we earn on qualifying purchases.
Where to Place Your Hammer Loop for Quick Access
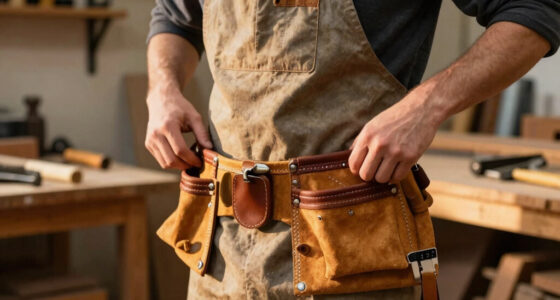
The best spot? On the side of your thigh or just below your waist—easy to reach without twisting or bending. Think about your typical movement: if you’re climbing or kneeling, a side placement keeps your hammer in sight and within easy reach.
Proper placement is crucial because it directly affects your workflow and safety. Placing the loop too high might cause your hammer to swing wildly or get caught on objects, risking injury or damage. Too low, and it becomes inconvenient to access quickly, especially during fast-paced tasks. For example, a plumber might position the loop on the right side of their tool belt, aligning it with their natural arm movement so they can grab the hammer smoothly without interrupting their flow. Testing different spots with an unloaded hammer helps identify the most ergonomic position, reducing fatigue and minimizing the risk of dropping your tool during critical moments. Remember, the goal is to find a balance between accessibility and comfort—your placement choices should complement your work style, ensuring swift and safe tool retrieval every time.
As an affiliate, we earn on qualifying purchases.
Step-by-Step: How to Add a Hammer Loop to Your Rig
- Measure and mark the desired location on your belt or pants. Use a ruler and chalk or fabric marker for precision.
- Cut a strip of your chosen material (about 4-6 inches long, 1 inch wide). Reinforce the ends with extra stitching or rivets.
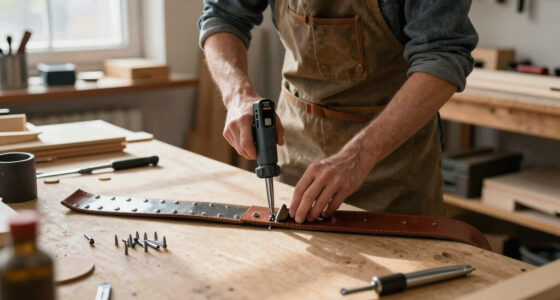
- Sew or rivet the loop securely onto your rig. Use heavy-duty thread or rivets for strength. Double-stitch for extra durability.
- Test with your hammer—check for fit, comfort, and stability. Adjust if needed.
reinforced tool loop for work belt
As an affiliate, we earn on qualifying purchases.
As an affiliate, we earn on qualifying purchases.
How to Reinforce Your Hammer Loop for Lasting Durability
Reinforcement is key. Use rivets or double-stitch the edges to prevent tearing under heavy use. Think of it like a seatbelt—every stitch and rivet is an extra layer of strength.
But why does reinforcement matter so much? Because the stress points—where the loop attaches and along the edges—are most vulnerable to tearing under repeated strain. If these areas aren’t properly reinforced, the loop can rip or fray quickly, especially when hauling heavier hammers or multiple tools. Proper reinforcement distributes the load more evenly, significantly extending the lifespan of your loop. For example, adding rivets at stress points acts like anchors, preventing the material from pulling apart. Double-stitching creates a backup line of defense, ensuring that even if one stitch fails, others hold firm. Think of it as fortifying your tool holder—every reinforcement step is an investment in safety, reliability, and durability, especially in demanding work environments where failure isn’t an option.
Comparing Materials and Placement Options
| Material | Durability | Comfort | Best For |
|---|---|---|---|
| Leather | High | Softens over time | Carpenters, electricians |
| Nylon | Very high | Rigid initially, softens with wear | Construction, heavy-duty work |
Common Mistakes and How to Avoid Them
Don’t place the loop too high or too low. It makes grabbing your hammer awkward. Also, avoid using weak stitches or thin material that tears easily.
For example, some workers sew the loop onto their pants with regular thread—big mistake. Use heavy-duty thread or rivets, and reinforce the edges for lasting performance.
Choosing the wrong placement or insecure attachment can lead to frustration and even safety hazards. A poorly positioned or weakly secured loop might detach during use, causing your hammer to fall or become a dangerous projectile. Similarly, skimping on stitching or using low-quality materials will likely result in early failure, forcing you to redo the work sooner and risking injury. To avoid these pitfalls, always test your placement with an unloaded hammer, use the strongest possible materials and fasteners, and double-check your work before relying on it in the field. This attention to detail ensures your addition remains secure, functional, and safe over the long haul.
Frequently Asked Questions
Can I add a hammer loop to any work pants or belt?
Most work pants and belts can accommodate a hammer loop if they have enough fabric or space. Just make sure the area is sturdy enough to hold the weight and that you can sew or rivet securely.What’s the best way to attach the loop to prevent tearing?
Use heavy-duty stitching or rivets at stress points, and reinforce the edges with extra stitches. Double-stitching and rivets dramatically increase the loop’s lifespan under heavy use.How much weight can a standard hammer loop hold safely?
A well-made hammer loop can comfortably hold a standard 16-ounce framing hammer or a similar-sized tool. Overloading beyond that risks tearing or detachment, so stick to the tool’s weight and size specifications.Are pre-made hammer loops worth buying?
Pre-made loops can be convenient, but customizing your own allows for better fit and durability. They’re a good option if you need something specific or want to experiment with placement.Conclusion
Adding a hammer loop isn’t just a quick upgrade—it’s a smart one. It keeps your tool handy, speeds up your work, and cuts down on hassle. A little effort now means a more efficient, safer workday every time.
Next time you’re adjusting your rig, remember: a simple strap of heavy fabric can transform your workflow. It’s a small tweak with a big payoff. Ready to give it a try?
College move-in / dorm season Picks
dorm essentials
As an affiliate, we earn on qualifying purchases.