TL;DR
Open a free Amazon Business account
Business pricing, bulk buying and tax-exempt orders.
Create a free accountAs an affiliate, we earn on qualifying purchases.
Adding power strips to a tool cabinet makes your workspace safer and more organized. Follow proper mounting, wiring, and safety steps to avoid hazards and keep your tools powered up efficiently.
Imagine reaching into your tool cabinet, and every outlet is a tangled mess of cords. Or worse, a dangerous overload waiting to happen. You know your tools need power, but the way you get it matters. Adding power strips isn’t just about plugging in—it’s about safety, organization, and making your workspace work for you.
In this guide, you’ll learn how to add power strips to your tool cabinet safely and smartly. From choosing the right strip to mounting and wiring, I’ll walk you through every step. No fluff, just real-world tips to keep your tools powered and your workspace tidy.
Choose a surge-protected, UL-listed power strip rated for your tools’ load.
Mount the strip securely inside or outside the cabinet for quick access and safety.
Follow electrical safety rules: turn off power, avoid daisy-chaining, and keep cords organized.
Use cable management tools like clips and labels to maintain a tidy workspace.
Consult a professional if wiring directly into your cabinet or circuit, especially for high-power setups.
How to Add Power Strips to a Tool Cabinet
Turn a tangle of cords into a secure, accessible power station. Choose the right strip, calculate the load, mount it firmly, connect it correctly, and route every cable with purpose.
Build the setup around the tools
List every tool, charger, light, and accessory that may run at the same time. The power strip must suit the combined load—not merely provide enough sockets.
Choose certified hardware
Look for UL listing or ETL certification, surge protection, a built-in circuit breaker, grounding, and an amperage rating appropriate for the intended tools.
Map the cord paths
Place outlets where plugs remain visible and reachable. Avoid sharp cabinet edges, drawer slides, hinges, hot surfaces, wet zones, and locations that pinch cords.
Match the fastener
Use brackets or screws for a dependable installation. Pre-drill wood; use suitable hardware for sheet metal. Adhesive mounts are best reserved for light-duty applications.
Wire it up in five controlled moves
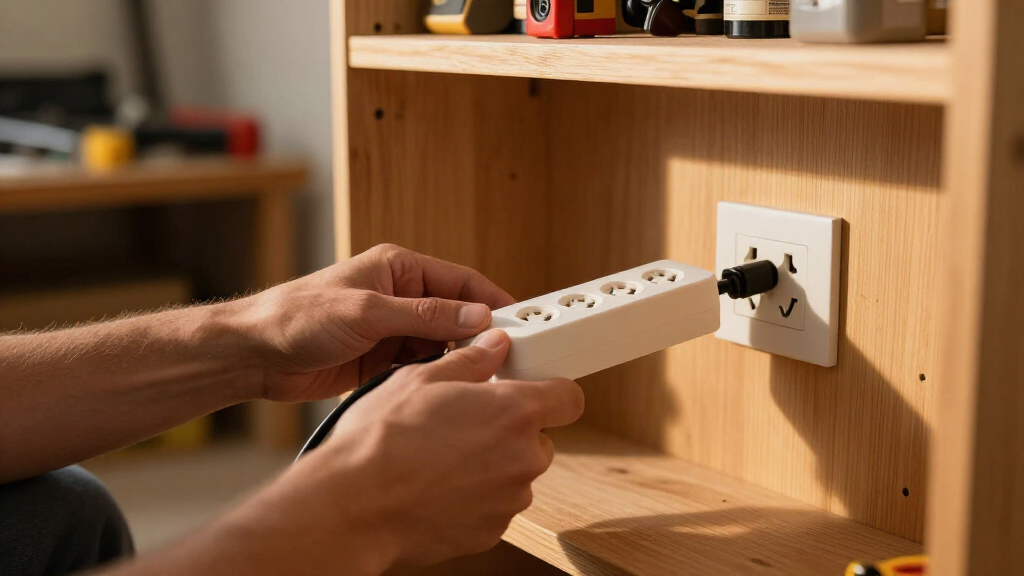
For a plug-in strip, “wiring” means providing a safe route to a nearby receptacle. Do not open, modify, or hardwire a consumer power strip.
De-energize
Switch off the relevant breaker before working around an outlet or fixed wiring.
Verify capacity
Confirm the strip, receptacle, and branch circuit can support the planned load.
Mount securely
Fix the strip in place without drilling into its casing or obstructing its breaker.
Connect directly
Plug the strip into a grounded wall outlet—never into another strip.
Dress the cables
Clip, sleeve, label, and strain-relieve cords while preserving easy access.
Standard versus workshop grade
A rugged strip costs more, but metal construction, stronger mounting provisions, overload protection, and environmental resistance are valuable in an active workshop.
| Feature | Standard strip | Heavy-duty / workshop grade | Decision signal |
|---|---|---|---|
| Surge protection | ~ Often included | ✓ Higher-joule options common | Prefer for chargers and electronic tools |
| Current rating | Typically 10–15A | Typically 15–20A+ | Must match plug, circuit, and expected load |
| Enclosure | ~ Lightweight plastic | ✓ Metal or rugged polymer | Choose for impact and abrasion exposure |
| Moisture resistance | ✗ Rare | ~ Available on selected models | Required rating depends on location |
| Permanent mounting | ~ Keyholes may be provided | ✓ Brackets or mounting flanges | Use manufacturer-approved mount points |
Typical rating range
Relative current capacity commonly seen across strip categories.
Load planning zone
Keep sustained demand comfortably below the weakest component’s rating.
Example: 1,200W ÷ 120V = 10A
Every safe setup follows the same logic
Each decision protects the next one. Certification alone cannot compensate for an overloaded circuit, poor mounting, damaged cords, or obstructed ventilation.
Installation checklist
- Plan the layout before drilling or fixing brackets.
- Keep the switch and overload reset accessible.
- Use clips, sleeves, hooks, and strain relief.
- Label outlets by tool group or operating zone.
- Inspect plugs, cords, and outlets regularly.
Non-negotiable limits
- Do not daisy-chain one power strip into another.
- Do not exceed strip or branch-circuit ratings.
- Do not route cords through drawer slides or sharp edges.
- Do not conceal a strip where heat or damage goes unnoticed.
- Do not hardwire consumer equipment yourself.
Frequently asked questions
Is an internal cabinet installation safe?
Yes, when the strip is certified, properly rated, securely mounted, grounded, ventilated, and protected from pinching, moisture, metal debris, and overload.
Inside or outside—which is better?
Internal mounting looks cleaner and offers protection; external mounting improves access and visibility. Choose the position that keeps plugs reachable and cords undamaged.
How can overloads be prevented?
Add the wattage of tools that may operate together, convert watts to amps, compare the result with every applicable rating, and distribute demanding tools across suitable circuits.
What is the best cable-management method?
Use smooth-edged clips, sleeves, hooks, grommets, and labels. Leave enough slack for comfortable use without creating loops that snag, drag, or become trip hazards.
Pick the Right Power Strip for Your Tool Cabinet
First things first: not all power strips are created equal. You need one that can handle your tools’ power draw and withstand the workshop environment. Look for surge protection, UL listing, and a heavy-duty build.
For example, a 6-outlet surge protector with a 15-amp rating is usually enough for most DIY tasks. But if you run high-powered tools, consider a strip rated for 20 amps or more, or even a dedicated hardwired circuit.
Here’s a quick comparison:
| Feature | Standard Power Strip | Heavy-Duty/Workshop Grade |
|---|---|---|
| Surge Protection | Usually included | Included, often with higher joule ratings |
| Amperage | 10-15 amps | 15-20 amps or more |
| Build Material | Plastic, lightweight | Metal, rugged plastic |
| Weather Resistance | Rare | Often weatherproof or splash-resistant |
Choosing wisely now prevents headaches later. It’s an investment in safety and durability.
UL-listed surge protector power strip for workshop
As an affiliate, we earn on qualifying purchases.
As an affiliate, we earn on qualifying purchases.
Mount Your Power Strip Securely — Inside or Outside
Mounting is the key to keeping cords tidy and your workspace safe. You can opt for internal mounting inside the cabinet for a clean look, or external mounting for quick access. The trick? Secure it firmly with brackets, screws, or heavy-duty adhesive.
For example, inside a metal cabinet, use metal brackets attached with screws. For wood cabinets, heavy-duty screws in pre-drilled holes do the job. If you want a quick fix, industrial-strength double-sided tape or adhesive mounts can work, but check their weight capacity.
Remember: accessibility matters. Mount the strip where you can reach it easily without twisting cords or crawling behind the cabinet.
Why does this matter? Proper mounting not only prevents accidental dislodging or damage but also reduces clutter and the risk of electrical hazards. A loosely mounted strip can become a tripping hazard or get damaged over time, which could lead to shorts or electrical fires. Weigh the trade-offs: internal mounting offers a cleaner look and protection from dust or moisture, while external mounting provides convenience but may expose the strip to more environmental risks.
mountable power strip for tool cabinet
As an affiliate, we earn on qualifying purchases.
As an affiliate, we earn on qualifying purchases.
Wire It Up Properly — Follow These 5 Steps
Wiring a power strip into your tool cabinet is straightforward but requires attention to safety. Here’s a simple 5-step process:
- Turn off power at the circuit breaker. Safety first.
- Choose a dedicated circuit or outlet nearby. Avoid daisy-chaining multiple strips.
- Mount the power strip securely, as described above.
- Connect the power strip’s cord directly to the outlet or hardwired connection.
- Use cable clips or zip ties to tidy up excess cord length and prevent tripping hazards.
If you’re not comfortable with electrical wiring, consult a licensed electrician. It’s better to be safe than sorry.
Why is this important? Proper wiring ensures your setup can handle the load without overheating or risking electrical fires. Using the wrong gauge wire or overloading circuits can lead to dangerous conditions, including fires or equipment damage. Careful wiring and organization reduce these risks and extend the lifespan of your tools and electrical components.
wireless cable management clips for workshop
As an affiliate, we earn on qualifying purchases.
As an affiliate, we earn on qualifying purchases.
Ensure Safety & Compliance — Don’t Cut Corners
Electrical safety is non-negotiable. Always use UL-listed or ETL-certified power strips rated for workshop use. Avoid daisy-chaining multiple strips—they can overload circuits quickly.
Follow local electrical codes, and if you’re wiring directly into the cabinet or wall, consider hiring a professional. Proper grounding, circuit protection, and avoiding overloading are your best defenses against hazards.
Why does this matter? Non-compliance or cutting corners can lead to serious hazards like electrical fires, shocks, or damage to your tools. Using certified equipment ensures your setup meets safety standards, and professional wiring guarantees correct grounding and circuit protection. Remember, the cost of proper safety measures is small compared to the potential damage or injury from neglecting them.
high load capacity power strip for tools
As an affiliate, we earn on qualifying purchases.
As an affiliate, we earn on qualifying purchases.
Keep Cords Tidy & Accessible for Peak Efficiency
Once installed, organize your cords with clips, hooks, or cable sleeves. Keep the cords short enough to avoid slack but long enough to reach your tools comfortably.
Label outlets if you’re running different zones or tool groups. For example, designate one strip for power tools, another for chargers or lights. This speeds up work and reduces the risk of overloads.
Why does this matter? Proper organization not only improves safety by preventing tripping hazards but also enhances efficiency. When cords are tangled or cluttered, it becomes harder to identify which outlet powers which tool, leading to potential overloads or accidental disconnections. Clear labels and organized cords minimize downtime and keep your workspace safer and more productive.
Quick Tips for a Safe & Tidy Power Setup
- Plan your layout before drilling or mounting.
- Use high-quality, certified power strips.
- Keep cords neat with clips or sleeves.
- Inspect cords and outlets regularly.
- Never overload a single strip or circuit.
Frequently Asked Questions
Is it safe to install a power strip inside my tool cabinet?
Yes, if you choose a UL-listed, surge-protected strip rated for workshop use, mount it securely, and follow electrical safety guidelines. Proper grounding is essential, and avoid overloading.Can I hardwire a power strip into my tool cabinet?
Hardwiring is possible but best left to a licensed electrician. For safety and compliance, use dedicated circuits or outlets and follow local electrical codes.How do I prevent overloads in my power setup?
Distribute your tools across multiple outlets or circuits, avoid daisy-chaining strips, and always check the total wattage. Regularly inspect cords for wear or damage. Overloads can cause circuit tripping, electrical fires, or damage to your tools, so understanding your load capacity and planning accordingly is crucial for safety and longevity.What’s the best way to organize cords after installation?
Use cable clips, sleeves, or hooks to keep cords tidy and prevent tripping hazards. Label outlets for different zones or tools for quick access.Are there safety regulations I should follow?
Yes, always follow local electrical codes, use UL-listed products, and avoid daisy-chaining multiple strips. When in doubt, hire a professional for wiring or complex setups.Conclusion
Adding power strips to your tool cabinet isn’t just about convenience — it’s about safety and efficiency. Proper mounting, wiring, and organization turn your workspace into a safer, more productive zone.
Remember: a well-designed electrical setup lasts longer, protects your tools, and keeps hazards at bay. Take the time to do it right, and you’ll wonder how you ever worked without it.
Flea & tick season Picks
flea and tick prevention
As an affiliate, we earn on qualifying purchases.