
TL;DR

Get business pricing on tools and workshop supplies
- Business-only prices and quantity discounts
- Tax-exempt purchasing
- Multiple users, one account, clear invoices
Worn belt holes and broken buckles are common, but fixing them can be simple and cost-effective. Reinforcing holes, replacing buckles, or patching damage can extend your belt’s life significantly.
Reinforcing or resizing belt holes with leather patches or sewing can prevent further damage and extend your belt’s life.
Replacing or repairing a buckle is quick and often cheaper than buying a new belt — especially for high-quality items.
Using proper tools like leather punches, glue, and rivets makes DIY repairs more durable and professional-looking.
Know when a repair is better left to a pro — especially for expensive or severely damaged belts.
Regular maintenance and smart storage habits greatly increase your belt’s longevity.
How to Fix a Worn Belt Hole or Buckle
A stretched hole or failing buckle does not have to retire your favorite belt. Reinforce weak leather, restore the fit, or install a compatible buckle with a few basic tools—and keep good gear working longer.
Five rules for a repair that lasts
Successful repairs address the cause—not just the visible damage. A snug fit, clean bonding surface, compatible hardware, and even tension all reduce repeat failure.
Reinforce early
Patch or stitch a stretched hole before the weakened edge becomes a tear.
Match the buckle
Choose hardware that fits the belt width, thickness, and attachment style.
Use proper tools
A leather punch, glue, rivets, and sturdy thread create cleaner results.
Know the limit
Designer, delicate, or structurally damaged belts may need a professional.
Prevent repeats
Avoid over-tightening and store the belt rolled loosely or hanging straight.
Reinforce, resize, then rest
A patch redistributes tension around fatigued leather. A correctly sized hole improves fit and helps prevent the buckle pin from pulling against one damaged edge.
Clean
Remove dirt and oils so adhesive and stitches can grip securely.
Cut
Trim a small leather patch close to the belt’s thickness and flexibility.
Bond
Glue the patch behind the hole or stitch it with strong leather thread.
Punch
Create a neat, snug opening without cutting too close to an existing hole.
Cure
Let the adhesive dry fully before bending, fastening, or loading the belt.
Repeated fastening creates material fatigue. Reinforcement spreads that stress across a broader area, while correct sizing reduces movement around the buckle pin. The small aesthetic tradeoff of a patch can prevent a much larger tear.
Restore an even, secure connection
A loose or bent buckle can slip under tension. Correct attachment restores safety, distributes load evenly, and can refresh the belt’s style without replacing a sound strap.
Inspect the attachment
Identify screws, snaps, rivets, stitching, or a buckle clip before removal.
Remove carefully
Protect the strap from cuts and preserve reusable hardware where possible.
Match width and style
The replacement must accept the belt cleanly without pinching or excess play.
Attach and test
Set rivets or stitches firmly, then test the buckle gradually under tension.
DIY, professional repair, or replace?
Assess the belt’s material, value, structural condition, and repair cost before choosing a route. Surface wear is different from damage that compromises strength.
| Condition | DIY repair | Professional | Replace | Best action |
|---|---|---|---|---|
| One enlarged hole | ✓ Strong fit | ~ Optional | ✗ Premature | Patch, stitch, and repunch |
| Removable broken buckle | ✓ Straightforward | ~ For luxury items | ✗ Usually unnecessary | Install a width-matched buckle |
| Designer or sentimental belt | ~ Higher risk | ✓ Recommended | ~ Last resort | Preserve finish and original hardware |
| Deep cracks or long tears | ✗ Weak structure | ~ Assess first | ✓ Often safest | Replace if strength is compromised |
Rule of thumb · Repair localized wear; replace widespread structural failure.
Repairability spectrum
Minor hole wear sits in the safe DIY zone. Multiple cracks and weakened layers move the belt toward replacement.
Value-based choice
Professional work becomes more worthwhile as craftsmanship, purchase price, or sentimental value increases.
Quick answers before you begin
Most localized repairs are approachable at home. The exceptions are severe structural damage and valuable belts where an imperfect repair could reduce both strength and appearance.
Can I fix a worn hole at home?
Yes. Clean the area, add a leather patch or sturdy stitching, and use a leather punch for a neat opening. Many minor repairs take less than 30 minutes of active work.
How do I replace a bent buckle?
Remove its screws, snaps, rivets, or stitching; select a buckle matching the strap width; then secure it with compatible hardware and test the fit under light tension.
Is a high-end belt worth repairing?
Usually. Professional reconditioning or hardware replacement can preserve craftsmanship, sentimental value, structural integrity, and a significant original investment.
What tools matter most?
A sharp leather punch, strong leather adhesive, patch material, leather needles, waxed thread, and correctly sized rivets cover the most common repairs.
When should I stop repairing?
Replace the belt when leather is deeply cracked across broad areas, layers are separating, tears affect load-bearing sections, or repair cost exceeds its practical value. For everyday durability, inspect early, avoid over-tightening, condition leather appropriately, and store the belt without sharp folds.
How to Reinforce or Resize a Worn Belt Hole
Worn or stretched belt holes are a common headache, but they’re easy to fix with some quick tricks. Reinforcing or resizing the hole prevents further damage and keeps your belt fitting snug.
Why this matters: Over time, repeated use causes the material around the hole to weaken, which can lead to tearing or the hole enlarging, compromising both the belt’s appearance and its functionality. Reinforcing the hole with a leather patch redistributes stress, preventing further enlargement and extending the belt’s life. Resizing the hole with a leather punch offers a better fit, especially if the belt has stretched or the existing hole is too large. These actions address the root causes—material fatigue and poor fit—helping you avoid costly replacements and ensuring your belt remains functional and comfortable.
Here’s how:
- Clean the area around the worn hole to remove dirt and oils, which helps the patch or repair adhere better.
- Cut a small piece of leather, roughly the same thickness as your belt, to reinforce the weakened area. Choosing a durable leather ensures the reinforcement withstands daily stress.
- Apply leather glue to the patch and press it over the worn hole, or sew it in place with sturdy thread. Reinforcing prevents the hole from enlarging further and adds durability, but consider the tradeoff: adding a patch might alter the belt’s aesthetics slightly.
- Use a leather punch to create new, snug holes if needed, or to resize the existing one for a better fit. Resizing can improve comfort and reduce stress on the material, but be careful to avoid making the hole too tight or too loose.
- Let the glue dry thoroughly before using, ensuring a strong bond that resists wear.
This approach not only prolongs the belt’s life but also maintains its aesthetic and functional integrity, saving you money and hassle in the long run. Proper reinforcement and resizing ensure your belt remains reliable, comfortable, and visually appealing, making these small investments worthwhile.
As an affiliate, we earn on qualifying purchases.
Replacing or Repairing a Broken Belt Buckle
A broken buckle can turn a good belt into a useless strap. But beyond the inconvenience, a damaged buckle compromises the belt’s overall function and safety — a loose or bent buckle can cause the belt to slip unexpectedly or even break under tension. Repairing or replacing the buckle restores both the visual appeal and the secure fit of your belt, which is crucial for daily wear and safety. Choosing to repair rather than replace a buckle can be a cost-effective decision, especially if the belt itself is still in good condition. Additionally, upgrading to a different style or material of buckle allows you to refresh your look, making your belt more versatile and extending its usability.
Why it matters: A well-attached and properly functioning buckle distributes tension evenly across the belt, preventing uneven wear and reducing the risk of sudden failure. If the buckle is bent or loose, it can cause the belt to slip or fail at inopportune moments, which might compromise safety or style. Repairing the buckle involves understanding how it’s attached and ensuring proper reattachment—improper installation can lead to early failure or damage. Taking the time to fix or replace the buckle correctly ensures that the belt remains secure, functional, and stylish, saving you money and hassle while maintaining safety and appearance.
Follow these steps:
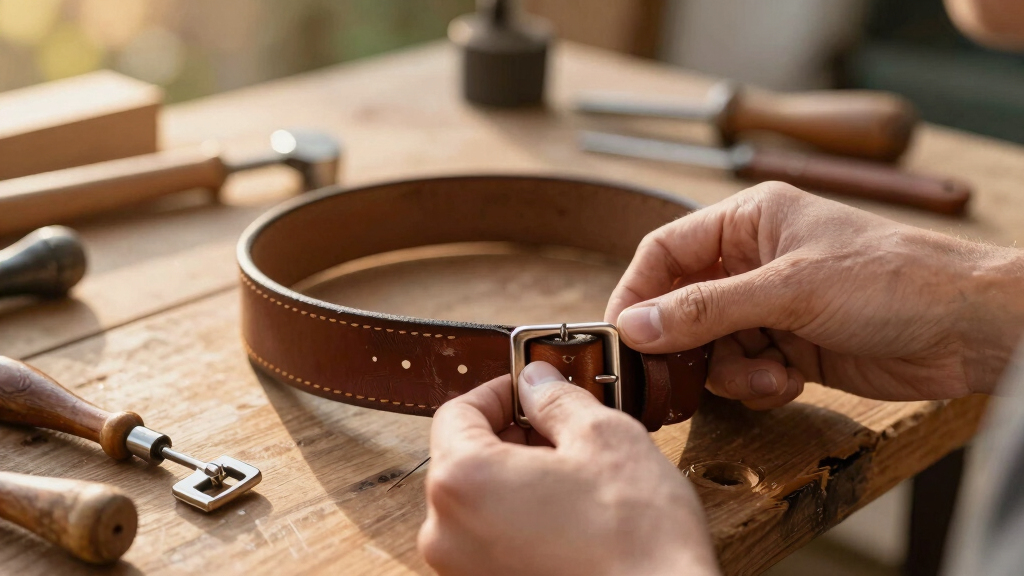
- Remove the current buckle — usually held with rivets or screws. Carefully examine how it’s attached to understand what tools are needed for removal.
- Choose a compatible replacement buckle that matches the belt width and style, considering both aesthetics and durability.
- Attach the new buckle using rivets, or sew it onto the belt if it’s a fabric or leather belt with stitching. Proper attachment ensures the buckle remains secure under regular use, but also consider the tradeoff: a poorly attached buckle can lead to early failure or damage to the belt.
- Test the fit and make adjustments as needed, ensuring the belt holds securely and the buckle functions smoothly.
This straightforward repair not only saves money but also allows you to customize your belt’s look, making it a practical and stylish fix that preserves your investment. Proper attachment and correct fitting are key to ensuring safety, durability, and aesthetic appeal over time.
As an affiliate, we earn on qualifying purchases.
Frequently Asked Questions
Can I fix a worn belt hole at home?
Absolutely. Using a leather patch or sewing a small piece of leather over the worn hole is an effective way to reinforce it. Resizing the hole with a leather punch or adding extra holes can also improve fit and durability. Most repairs take less than 30 minutes and cost only a few dollars in supplies.
How do I replace a broken or bent buckle?
Many belts have removable buckles. Simply remove the rivets or screws holding the old buckle, then attach the new one using rivets, sewing, or a buckle clip. Make sure the new buckle matches the belt width and style for a seamless look. Proper attachment and fitting are crucial—an improperly secured buckle can slip or break, risking damage or injury. Taking care to attach it securely ensures safety and longevity.
Is it worth repairing a high-end leather belt?
Yes. High-end belts often cost a lot and have sentimental value. Professional repairs, like reconditioning or patching, can keep the belt looking nearly new. Sometimes, investing in repair preserves both the style and function, saving hundreds compared to replacement. Proper repairs also help maintain the belt’s structural integrity, preventing further damage and prolonging its usable life.
What are the best tools to repair a leather belt?
Key tools include a leather punch, strong leather glue, sewing needles for leather, patches, and rivets. These tools allow you to reinforce holes, attach new buckles, and patch tears effectively. Investing in quality tools ensures your repairs are more durable, precise, and professional-looking, which directly impacts the belt’s longevity and your satisfaction with the repair.
When should I replace my belt instead of repairing?
If the leather is badly cracked, torn, or the belt has extensive damage that affects its strength and appearance, replacement is more practical. Repairs can only do so much if the material is beyond saving or if the cost outweighs the benefit. Recognizing when a belt has reached this point helps you avoid futile repairs and ensures safety and durability in your accessories.
As an affiliate, we earn on qualifying purchases.
Conclusion
Fixing a worn belt hole or buckle isn’t just about saving cash — it’s about making your gear last longer. A few simple repairs can buy you years of use and keep your style sharp. Remember, a well-maintained belt is a small investment with big returns.As an affiliate, we earn on qualifying purchases.
Fall yard work Picks
leaf blowers
As an affiliate, we earn on qualifying purchases.