
TL;DR

Get business pricing on tools and workshop supplies
- Business-only prices and quantity discounts
- Tax-exempt purchasing
- Multiple users, one account, clear invoices
Cutting a belt to length is straightforward if you measure carefully, use the right tools, and finish the edge properly. Always start by removing excess at the buckle end for the best results.
Always cut at the buckle end to preserve the belt’s style and hole pattern.
Measure your waist while wearing the belt for the most accurate trim.
Start with small trims—about 1cm—to avoid overcutting and ruining your belt.
Use a sharp craft knife and a steel ruler for the cleanest, straightest cut.
Finish the edge with sanding, burnishing, or dyeing to match the factory look.
How to Cut a Belt to Length Cleanly
Measure carefully, use the right tools, and finish the edge properly. The golden rule: always remove excess material at the buckle end to preserve the factory finish and the original hole pattern.
The most effective way to shorten a belt is at the buckle end, where you preserve the factory finish and hole pattern — making the alteration seamless and professional.
Five rules for a flawless trim
Always cut at the buckle end to preserve the belt’s style and hole pattern.
Measure your waist while wearing the belt for the most accurate trim.
Start with small trims — about 1 cm — to avoid overcutting and ruining your belt.
Use a sharp craft knife and a steel ruler for the cleanest, straightest cut.
Finish the edge with sanding, burnishing, or dyeing to match the factory look.
Shortening a removable-buckle leather belt
Wear & mark
Put the belt on through your usual trousers and find the perfect fit.
Remove buckle
Undo the screws, clamp, or snaps holding the buckle in place.
Mark the trim
Measure the removal amount at the buckle end — never the tip end.
Transfer pattern
Copy the original hole pattern and end shape onto the new position.
Cut square
Sharp blade + steel ruler. Shallow, controlled passes on a cutting mat.
Punch holes
Leather punch, 3–4 mm, matching original spacing exactly.
Finish edge
Sand, bevel, and burnish or apply edge paint in thin layers.
Reattach & test
Reinstall the buckle and check the fit — trim again if still loose.
Measure, mark, and cut it straight
Measure while wearing it
Don’t trust the labeled size — belt sizing varies between brands. Put the belt on through your intended trousers and mark the comfortable fastening point.
The middle hole should be your normal fastening point, leaving room to tighten or loosen. Example: belt is 100 cm, you need 90 cm — first trim to about 92 cm, test, then trim again in small steps.
Make the cut perfectly square
Use a steel ruler or carpenter’s square as a guide — clamp it down or hold it firmly. Make several shallow passes, gradually deepening the cut. Keep the blade perpendicular to avoid a beveled edge.
For a rounded or tapered tip, use the removed section as a template and trace it with light pencil marks before discarding it.
What type of belt do you have?
| Material | Cutting method | Edge finish | Home alteration |
|---|---|---|---|
| Full-grain / veg-tan leather | ✓ Fresh utility or craft knife, steel ruler, multi-pass | ✓ Burns and burnishes beautifully with water or gum tragacanth | ✓ Easy |
| Chrome-tanned leather | ✓ Sharp knife + straightedge | ~ May stay fuzzy — needs edge paint or sealant | ✓ Moderate |
| Bonded / laminated leather | ✗ Cutting may separate the layers | ✗ Unreliable sealing | ✗ Pro repair |
| Woven / synthetic webbing | ✓ Hot knife or webbing cutter seals as it cuts | ✓ Heat-sealed — test on offcut first, ventilate | ✓ Moderate |
| Fabric / elastic belts | ~ Tape the cut point, use sharp fabric shears | ~ Secure with stitching or binding | ~ Careful |
| Stitched / reversible / decorative | ✗ Requires special handling | ✗ Factory construction is hard to replicate | ✗ Pro repair |
Pro-level edge finish, ranked
Build thin layers of dye or paint and let each dry before the next. A glossy, polished edge is the detail that makes a shortened belt look like it came straight from the store.
Common mistakes — and how to avoid them
✗ Cutting the wrong end
Always cut at the buckle end when possible — it preserves the finished tip and hole spacing.
✗ Using a dull blade
Sharpen or replace it. Dull blades drag, slip, and tear — ragged edges start with a bad blade.
✗ Rushing the cut
Several shallow passes beat one forceful pass, every single time. Control is everything.
✗ Ignoring the hole pattern
Measure and replicate precisely. If original holes are 2 cm apart, copy that exactly — don’t estimate.
✗ Overcutting
Trim in small steps, test the fit, then trim again. Removed material cannot be restored.
✗ Skipping the edge finish
Sanding, burnishing, or dyeing improves both appearance and longevity of the alteration.
Frequently asked questions
How much should I cut off my belt?
Measure your waist while wearing the belt on the hole you usually use. Remove about 1 cm less than needed first, then test and trim again. Better to trim conservatively than to overcut.
Can I cut a leather belt with scissors?
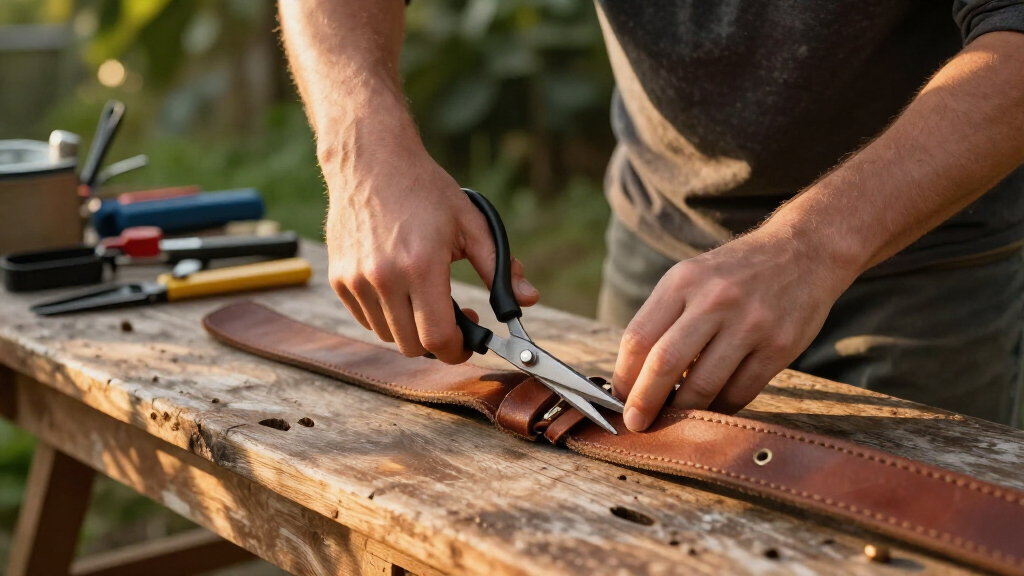
Thin leather might work with heavy-duty scissors, but for a clean, straight edge on thicker belts, use a sharp utility knife guided by a straightedge. Dull scissors cause ragged cuts.
How do I keep the cut edge professional?
Lightly sand the edge, bevel sharp corners, and burnish with water or a burnishing compound. For chrome-tanned or coated leather, apply thin layers of edge paint and let each dry fully.
Why the buckle end is your best bet for shortening
The first step in a clean cut is choosing the right end of the belt. Shortening at the buckle end preserves the factory-finished tip and the original hole pattern. This keeps the style intact and avoids messing up the part of the belt that shows. If the buckle is removable, that makes things even easier, allowing you to reattach it after trimming.
Imagine a leather belt with decorative stitching near the tip. Cutting at the buckle end means you don’t lose your carefully stitched design, keeping your belt looking sharp. It also prevents uneven holes that can happen if you cut from the other side, especially with woven or stitched belts.
As an affiliate, we earn on qualifying purchases.
Measuring the perfect fit — how to do it right
Before making any cut, put the belt on and mark the desired length. Don’t just rely on the labeled size. The real fit comes from how it feels when you wear it through your usual pants. The middle hole should be the main fastening point, giving room to tighten or loosen later.
For example, if you wear your belt on the third hole and it feels snug but comfortable, mark that spot with a pencil or a piece of tape. Use a ruler to measure from the buckle end to that mark. Remember: it’s better to cut a little more than needed and trim again if necessary.
As an affiliate, we earn on qualifying purchases.
How much material to remove — avoid overcutting
Removing too much at once can ruin your belt. Always start with a small trim—about 1cm (half an inch)—then test the fit. If it’s too long, trim a little more. Better to be conservative and precise than to cut too much and ruin the belt.
For instance, if your belt is 100cm and you need it to be 90cm, trim to about 92cm first. Test it on your waist. If it’s still loose, trim again in small increments. This approach prevents over-trimming and keeps your belt functional and neat.
As an affiliate, we earn on qualifying purchases.
Tools and techniques for a clean cut
The right tool makes all the difference. Leather belts respond best to a sharp utility or craft knife, guided with a steel ruler. Use a cutting mat or a scrap piece of wood underneath to protect your surface. Make several shallow passes rather than forcing one deep cut. This keeps the edge crisp and straight.
For woven or synthetic belts, a hot knife or specialized webbing cutter seals the fibers as it cuts, preventing fraying. Always test on an offcut first, especially with heat tools, and work in a well-ventilated space.
Imagine slicing through a thick leather strap—smooth, controlled passes are key to avoiding jagged edges and ensuring a neat finish.
As an affiliate, we earn on qualifying purchases.
How to make the cut perfectly square and straight
Once you’ve marked your cut line, it’s crucial to cut straight. Use a steel ruler or a right-angle square as a guide. Clamp it down if possible, or hold firmly. Make shallow, controlled passes with your blade, gradually deepening the cut. This prevents slipping and crooked edges.
For a rounded or tapered belt tip, you can use the existing shape as a template. Transfer it onto the new cut line with light pencil marks, then follow carefully. This keeps your belt looking professional and consistent.
Recreating holes for buckles or adjusters
Accurate holes are key for a secure fit. Use a leather punch or rotary hole punch of the correct size—usually 3mm or 4mm diameter for standard buckle prongs. Mark the new hole positions based on the original pattern, ensuring they are far enough from the edge to prevent tearing.
If you’re replacing a buckle, match the original hole spacing and size for consistency. For example, if the original holes are 2cm apart, replicate that exactly. Test punch on scrap leather first to avoid mistakes.
Finishing the cut edge for a professional look
A raw edge can look fuzzy or pale. To improve it, lightly sand with fine-grit abrasive paper or a leather edge beveler. Burnishing with a damp cloth and a burnishing compound creates a smooth, shiny edge. For coated or chrome-tanned leather, use edge paint to seal and match the original finish.
Imagine a leather belt with a glossy, polished edge—this detail makes it look like it came straight from the store. Take your time, build thin layers of dye or paint, and let each dry before the next. This gives a clean, durable finish.
Step-by-step for shortening a removable-buckle leather belt
- Wear the belt to find the perfect fit.
- Remove the buckle, screws, or snaps.
- Mark the amount to trim from the buckle end.
- Transfer the original hole pattern onto the new end.
- Use a sharp blade and straightedge to cut along your line.
- Punch new holes for the buckle prong or clasp.
- Finish the edges with sanding or burnishing.
- Reattach the buckle and test the fit.
Common mistakes to watch out for—and how to avoid them
- Cutting the wrong end—always the buckle end if possible.
- Using a dull blade—sharpen or replace it for clean cuts.
- Rushing the cut—several shallow passes beat one forceful pass.
- Ignoring the original hole pattern—measure and replicate precisely.
- Overcutting—trim in small steps, test, then trim again.
- Not finishing the edge—sanding, burnishing, or dyeing improves appearance and longevity.
Material considerations — what type of belt do you have?
Different materials respond differently to cutting. Full-grain leather cuts cleanly with a sharp blade, and edges can be burnished for a professional look. Chrome-tanned leather may need edge paint or sealing because it can stay fuzzy at the cut.
For bonded or laminated leather, cutting may cause layers to separate, making home alteration unreliable. Webbing or synthetic belts often require heat sealing—use a hot knife carefully.
For example, a thick, vegetable-tanned belt will take a sharp, new utility knife and burnish easily. A bonded leather belt might peel apart if cut improperly, so professional repair may be your best bet.
Frequently Asked Questions
How much should I cut off my belt?
Measure your waist while wearing the belt on the hole you usually use. Remove about 1cm less than needed first, then test and trim again if necessary. Better to trim conservatively than to overcut.Can I cut a leather belt with scissors?
Thin leather might be cut with heavy-duty scissors, but for a clean, straight edge on thicker belts, a sharp utility knife guided by a straightedge is better. Dull scissors can cause ragged cuts.How do I keep the cut edge looking professional?
Lightly sand the edge, bevel sharp corners, and burnish with water or a burnishing compound. For coated leather, apply edge paint carefully for a smooth, durable finish.What if my belt is made from bonded leather?
Bonded or laminated belts can delaminate when cut. They often don’t respond well to home trimming. Consider professional repair or replacing the belt if it starts to peel.How do I punch new holes without damaging the belt?
Use a proper leather punch or rotary hole punch of the correct size. Mark the exact location based on the original pattern, then punch firmly on a cutting surface for clean holes.Conclusion
Shortening a belt isn’t complicated when you follow the right steps. Measure carefully, cut with precision, and finish the edges for a professional look that lasts. The next time your belt feels just a bit too long, you’ll know exactly how to fix it—quickly and cleanly. A well-fitted belt turns a good outfit into a great one—and it’s easier than you think.Halloween Picks
halloween
As an affiliate, we earn on qualifying purchases.