
TL;DR

Get business pricing on tools and workshop supplies
- Business-only prices and quantity discounts
- Tax-exempt purchasing
- Multiple users, one account, clear invoices
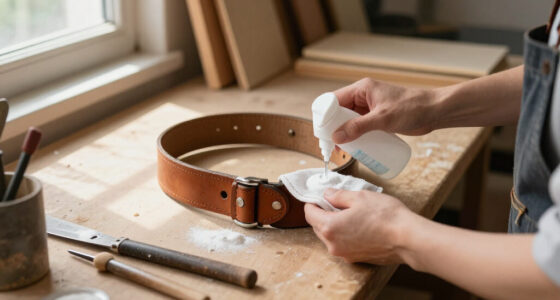
Adding a hole to a leather belt is straightforward if you measure precisely and use the right punch. Avoid drills and knives—stick with a leather punch for a clean, durable result. Always support the belt properly to prevent tearing or uneven edges.
Picture this: your favorite leather belt no longer fits perfectly, but you don’t want to buy a new one. Instead, you decide to add a new hole—simple, right? Not so fast. A poorly placed or uneven hole can ruin the look and weaken the leather.
In this guide, you’ll learn exactly how to add a new hole to your belt with confidence. It’s about precision, the right tools, and a bit of patience. Whether you’re adjusting for a tighter fit or fixing a worn-out hole, these steps will help you do it right the first time.
Always measure from existing holes to keep the belt’s appearance consistent.
Use a dedicated leather punch and support the belt properly for a clean, durable hole.
Punch from the finished side, aligning the tool perpendicular to the leather surface.
Test your punch on scrap leather before working on the actual belt.
Avoid using drills, knives, or heated objects—they damage the leather and create uneven edges.
How to Add a New Hole to a Leather Belt
A clean adjustment depends on three things: matching the existing pattern, choosing a proper leather punch, and supporting the belt while you cut. Measure carefully and remove one neat plug instead of tearing the leather fibers.
Match the belt’s original geometry
Use the neighboring holes as your template. Match their center-to-center spacing, diameter, shape, and alignment. Mark the new position lightly on the back while keeping it on the belt’s centerline.
Replicate the existing rhythm
Measure between the centers of two neighboring holes and transfer that exact distance. Do not estimate while the belt is curved around your body.
Four checks prevent most mistakes
One careful sequence, one durable hole
Practice on similar scrap leather first. When you move to the belt, keep it flat, finished-side up, and fully supported on a surface that can safely receive the punch.
Find the fit
Wear the belt and identify where the buckle prong should sit comfortably.
Measure
Remove the belt and copy the established center-to-center spacing.
Mark
Make a light mark on the back, precisely along the centerline.
Match
Select a round or oval punch that matches the existing openings.
Support
Place the belt finished-side up on scrap leather, dense rubber, or a cutting mat.
Align
Hold the punch perpendicular to the surface, centered over the mark.
Punch
Apply one firm, controlled cut and remove the complete leather plug.
Inspect
Check both sides, smooth only loose fibers, and test the buckle prong.
Choose a cutter built for leather
A rotary punch is convenient for routine home use. A drive punch and suitable mallet often deliver the crispest result in thick leather. Match an oval punch when the factory holes are elongated.
| Tool | Best use | Cut quality | Control | Limitation |
|---|---|---|---|---|
| Rotary leather punch | Home use and moderate thickness | ✓ Clean | ✓ High | Budget models may struggle with tough leather. |
| Drive punch and mallet | Crisp holes in thicker leather | ✓ Excellent | ✓ Precise | Needs a sturdy work surface and controlled force. |
| Oval belt-hole punch | Matching elongated factory holes | ✓ Factory-like | ✓ Precise | Less useful for standard round openings. |
| Professional service | Exotic, stitched, reinforced, or valuable belts | ✓ Best match | ✓ Expert | Requires a visit, fee, and possible wait. |
| Drill, knife, nail, or heat | Not recommended | ✗ Ragged | ✗ Unreliable | Tears fibers, enlarges holes, or damages the finish. |
Mallet note: Follow the punch manufacturer’s guidance. A rawhide, wooden, rubber, or polymer mallet may be preferable to a steel hammer.
Not every belt behaves the same way
The construction affects how cleanly the material cuts and how likely it is to crack, stretch, or separate. The bars below are a practical suitability guide, not material test results.
DIY punch suitability
Higher bars indicate a more predictable result with a sharp, correctly sized leather punch.
DIY or hand it over?
Choose the path that protects the belt’s construction and value.
Protect your hands, surface, and belt
Sharp tools and striking force require a stable setup. Secure the belt flat, keep your hands outside the cutting path, and never punch while holding the belt in your hand.
Safe working checklist
Avoid these shortcuts
The clean-hole logic
Each decision supports the next. Skip one link and the risk of poor alignment, ragged edges, or premature wear increases.
Why Measuring Correctly Is the Most Important Step
Adding a hole isn’t just about poking a random spot. It’s about matching the existing pattern so your belt looks consistent and functions well. The key is to measure from an existing hole. Measure the center-to-center distance between two holes—usually around 1/4 inch or 6mm—and replicate that spacing for your new hole.
Why does this matter? Precise measurement ensures your belt maintains its original aesthetic and functionality. If the holes are uneven, the belt can look sloppy and may not sit correctly on your waist, leading to discomfort or uneven wear. Also, inconsistent spacing can weaken the leather over time, especially if you repeatedly add holes without proper alignment. Using a ruler or calipers for accuracy reduces these risks and helps you achieve a professional finish. Marking lightly on the back of the belt with a fine pencil or scratch awl allows you to see your intended placement without marring the surface—an essential step to avoid costly mistakes. Remember, eyeballing or estimating can lead to crooked holes, which not only look bad but also compromise the belt’s integrity. Measure twice, punch once—precision is your best friend here.
As an affiliate, we earn on qualifying purchases.
Picking the Right Tool for the Job — Leather Punch vs. Drill
The choice of tool can make or break the quality of your finished belt. A leather punch is specifically designed to cut a clean, round hole by removing a plug of leather, which preserves the structural integrity of the belt. This method results in a smooth, professional appearance and minimizes damage to the leather fibers—crucial for the belt’s durability and longevity. Using a punch also allows for better control, reducing the chances of slips or uneven edges that can occur with improvised tools.
On the other hand, a drill might seem like a quick fix, but it’s often a poor choice. Drills tend to create ragged, torn edges because they push through the leather rather than cut it cleanly. This tearing can weaken the leather over time, making the belt more prone to stretching or breaking at the hole. Additionally, drilling can cause heat buildup, which may scorch or discolor the leather, especially if the drill bit is dull or used improperly. The tradeoff is clear: while drills might seem convenient, they compromise the belt’s appearance and durability. For a neat, lasting result, a drive punch combined with a mallet is the best practice. It provides a controlled, precise cut that maintains the leather’s strength and aesthetic appeal. For oval or elongated holes—such as for buckles—an oval punch offers a factory-finished look, ensuring the belt functions smoothly and looks professional. Always test your chosen tool on scrap leather to confirm alignment and size before working on your actual belt.
As an affiliate, we earn on qualifying purchases.
Step-by-Step: How to Add a Hole Without Ruining Your Belt
- Put on the belt and find the perfect fit. Mark the spot where you want the new hole on the back, using your measurement from the existing holes.
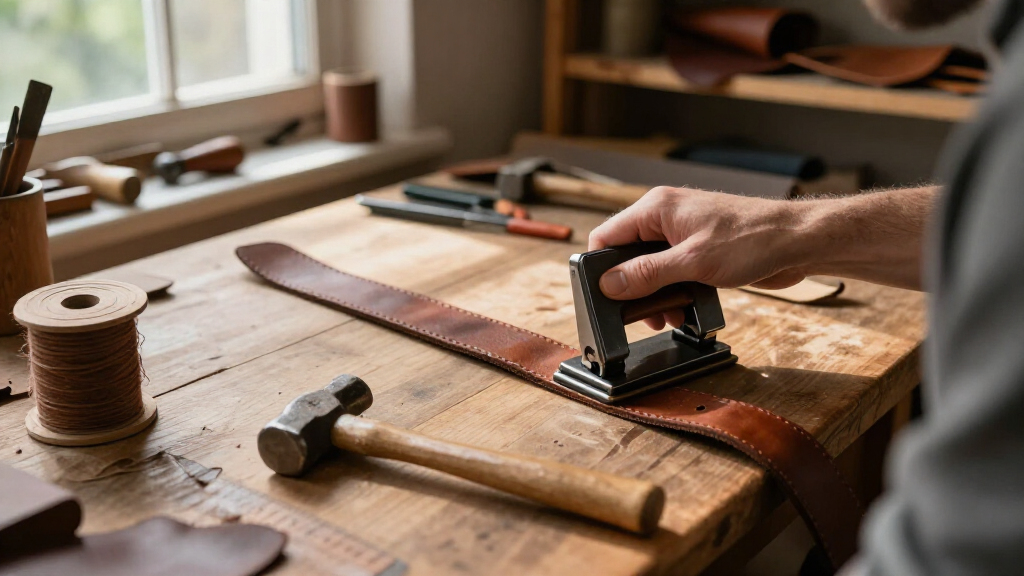
- Remove the belt and lay it flat on a scrap piece of leather, a dense rubber mat, or a cutting board. This supports the leather and prevents slipping, reducing the risk of uneven or jagged holes.
- Select the right punch matching your marked size. Ensure it’s sharp and free of debris—dull or dirty tools can cause uneven cuts or damage the leather.
- Align the punch vertically over your mark. Hold the punch perpendicular to the belt surface for a clean, round hole. Proper alignment is critical; tilting the punch can cause oval or uneven holes, which look unprofessional and weaken the leather.
- Strike with a mallet or hammer firmly and evenly. Use controlled force—too little won’t cut through, too much can deform the leather or cause blowouts. You should hear a satisfying ‘pop’ as the plug is removed, indicating a clean cut.
- Inspect the hole. Remove the plug and check the edges. If fibers are loose or frayed, gently smooth them with a fine file or sandpaper—be careful not to enlarge the hole or alter its shape. A clean edge preserves the belt’s strength and appearance.
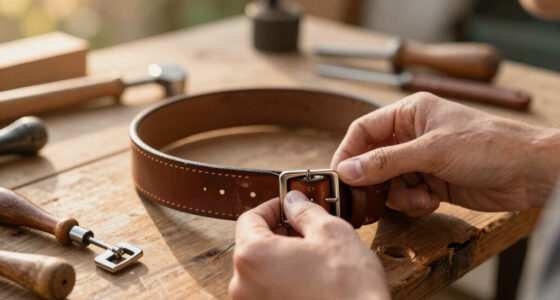
- Test the fit by pushing the buckle prong through the new hole. It should slide easily without excessive force but also hold securely—this balance ensures comfort and longevity.
Practice on scrap leather first if you’re nervous. This step helps you fine-tune your technique, ensuring the size and placement are perfect before working on your prized belt. Precision here saves time and prevents costly mistakes.
As an affiliate, we earn on qualifying purchases.
Tools That Make It Easier — From Basic to Pro
| Tool Type | Best For | Pros | Cons |
|---|---|---|---|
| Rotary Leather Punch | Home use, moderate thickness leather | Multiple sizes, adjustable, portable | Struggles with very thick or tough leather |
| Drive Punch & Mallet | Clean, controlled holes | Precise, strong punch, good control | Requires a sturdy surface and some force |
| Oval Belt-Hole Punch | Matching factory oval holes | Great for elongated holes, natural look | Less versatile for round holes |
| Professional Punching Service | Expensive, exotic, or heavily reinforced belts | Perfect match, clean finish, saves time | Cost and wait time |
For most DIYers, a good leather punch and a mallet are enough to add a crisp, professional-looking hole. But if your belt is special—like an exotic hide or reinforced construction—consider a professional service. Remember, investing in quality tools not only ensures a cleaner cut but also makes the process easier and more consistent, especially if you plan to do multiple adjustments or repairs over time. Choosing the right tool based on your belt’s material and your comfort level can save you frustration and improve the overall finish.
As an affiliate, we earn on qualifying purchases.
Safety Tips to Keep You and Your Belt Safe
Working with punches involves sharp tools and force, which can lead to injuries if not handled carefully. Always keep your fingers well outside the punch’s path to prevent accidental cuts. Use a stable, non-slip surface—such as a cutting mat or thick piece of wood—rather than glass, tile, or concrete, which can crack or slip unexpectedly. Proper support minimizes movement and helps maintain control, reducing the risk of slips that can cause injury or uneven holes.
Wear safety glasses when striking with a mallet or hammer—flying plugs or fragments can cause serious eye injuries. Never hold the belt in your hand while punching; instead, secure it flat on your work surface with clamps or weights if needed. Be cautious with heated tools or nails—heating metal can scorch the leather, produce fumes, and weaken the material. Always store punches safely—preferably hanging or in a secure box—to prevent accidental cuts or damage. Remember, safety isn’t just about avoiding injuries; it also ensures your work remains neat and professional, saving time and frustration in the long run.
Common Mistakes and How to Avoid Them
Even experienced DIYers can make mistakes that compromise the look and durability of their belt. The most common? Marking the hole while the belt is bent around your waist. This causes crooked placement because the leather’s shape changes when bent, leading to uneven holes that look unprofessional and may cause discomfort. Always lay the belt flat before marking and punching to ensure symmetry and proper alignment.
Another frequent error is measuring from the edge instead of the centerline. This shifts the hole too close to the tip or buckle, weakening the leather at stress points and risking tearing or stretching. Use a ruler or calipers to measure the exact center-to-center distance between existing holes, maintaining the original pattern and structural integrity.
Using a punch larger than the existing holes results in an uneven, sloppy look and weakens the leather’s fibers. Match your punch size precisely to the original holes to preserve the belt’s aesthetic and strength. Additionally, avoid creating multiple close-together holes, as this significantly weakens the leather and can cause tearing over time. Instead, space holes appropriately, respecting the leather’s natural limits.
Finally, do not resort to knives or scissors for round holes. These tools create ragged, uneven edges that are prone to tearing, especially with repeated flexing. A dedicated punch ensures a clean, round cut, which maintains the leather’s durability and appearance over time. Using the proper tools and techniques is essential for a professional, long-lasting result.
Care and Repair After Adding a Hole
Once you’ve punched the new hole, the belt generally requires minimal care. If the edges look dry or fuzzy, applying a small amount of leather edge conditioner can help restore smoothness and prevent fraying. This preserves the belt’s appearance and prevents further damage. Be cautious not to over-apply, as excess conditioner can darken the leather or affect its flexibility.
If the old hole has stretched or torn, adding a new hole might only be a temporary fix. Over time, repeated stress or improper placement can weaken the leather, leading to further tearing or deformation. For significant damage, consider reinforcing the area with leather patching or replacing the belt altogether. A belt with a well-placed, clean hole not only looks better but also performs longer, especially if you maintain it regularly.
Regular inspection is key—check around the new hole for signs of wear or cracking. Proper storage—flat, away from direct sunlight and extreme temperatures—extends the belt’s lifespan. Clean with a damp cloth when needed, avoiding harsh chemicals that can damage the leather. Proper maintenance ensures your belt remains functional and attractive for years to come.
Latest Trends and Innovations in Belt Hole Punching
Recent innovations focus on making belt alterations easier and more precise, reflecting the growing demand for customization. Micro-adjustable ratchet belts, for example, don’t have traditional holes but instead use a track system to allow fine-tuning of fit—adding a new hole to standard belts remains a popular method for those seeking a classic, adjustable look.
Interchangeable punch tubes and improved compound-action punches have made the process more accessible, requiring less hand strength and delivering cleaner cuts. DIY leatherworking kits now often include cutting mats, measuring guides, and finishing tools, empowering enthusiasts to achieve professional results at home. These advancements mean you can make precise, clean adjustments without specialized training, saving time and money.
Some modern belts incorporate built-in adjustment systems or removable straps, reducing the need for multiple holes. However, for traditional leather belts, mastering the punch remains the most reliable way to ensure a perfect fit. Staying informed about these trends helps you choose the best approach for your needs and enhances your leatherworking skills over time.
Frequently Asked Questions
What size punch should I use?
Match the punch size to your existing holes for the best look and fit. Measure the diameter of the original holes and test on scrap leather before punching your belt.
How far apart should belt holes be?
Copy the original center-to-center spacing—usually between 1/4 inch and 3/8 inch. This keeps the pattern uniform and comfortable.
Can I use a drill?
It’s possible but not recommended. Drills tend to leave ragged edges and can damage the leather. A leather punch is safer for a clean, professional finish.
Should I heat the punch or tool?
No. Heating tools can scorch the leather, release fumes, and cause permanent damage. Use sharp, cold tools for best results.
When is it better to see a professional?
When your belt is expensive, heavily reinforced, exotic, or has special construction. Professionals can match the original style and ensure a clean, lasting result.
Conclusion
Adding a new hole to a leather belt isn’t complicated—if you follow the right steps. Measure carefully, choose the correct punch, and support the belt while working. It’s about patience and precision, not brute force.
Remember: a well-placed, clean punch can extend your belt’s life and keep it looking sharp. Next time you need that extra notch, grab your tools and go—your belt will thank you.
Columbus Day / Indigenous Peoples' Day Picks
long weekend sales
As an affiliate, we earn on qualifying purchases.