
TL;DR

Get business pricing on tools and workshop supplies
- Business-only prices and quantity discounts
- Tax-exempt purchasing
- Multiple users, one account, clear invoices
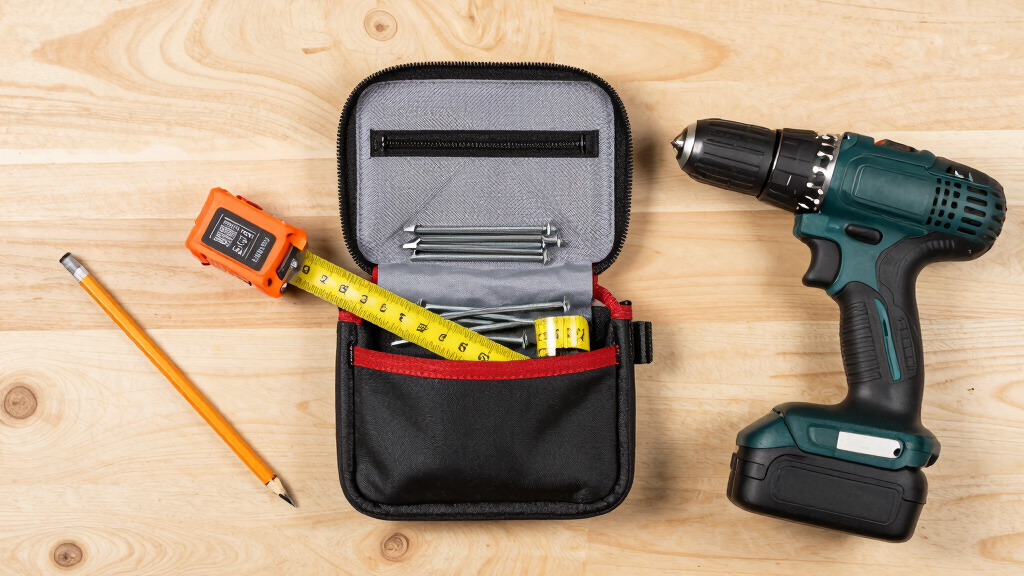
A smart tool pouch setup keeps essential tools within reach, minimizes fatigue, and enhances safety. Using durable materials and modular designs, framers can optimize their workflow for demanding jobs.
Prioritize tools you use most often; keep them in easily accessible pockets.
Choose durable materials like nylon or leather for longevity and weather resistance.
Customize your pouch layout based on your specific workflow and tasks.
Use modular and ergonomic designs to reduce fatigue and improve safety.
Stay updated on new materials and features that enhance your setup’s efficiency.
Tool Pouch Setup for Framers
A smart setup keeps essential tools within reach, trims wasted movement, and protects your body through long framing days. The goal is simple: carry what matters, place it where your hands expect it, and let the pouch follow your workflow.
Choose What Earns Its Place
Your pouch is a working system, not a portable toolbox. Start with tools used repeatedly during measuring, marking, cutting, and fastening. Add specialty tools only when the day’s scope demands them.
Hammer
Keep in a secure rear or side loop where the handle clears your leg.
Tape Measure
Give it a dedicated front clip or pocket for instant one-handed access.
Pencils
Carry multiples in a narrow sleeve, separated from sharp blades.
Nails & Screws
Separate fastener types with divided, open-top compartments.
Screwdrivers
Carry only the driver profiles used on the current job.
Chisel
Use a fitted sleeve that covers the edge and prevents shifting.
Level
Choose a compact model that sits flat without restricting movement.
Utility Knife
Store low and outward-facing with the blade fully retracted.
Organize Around Natural Reach
Place the highest-frequency tools where your hands rest. Keep heavy and sharp items secure, low, and away from the torso. Reaching, bending, and twisting are signals that the layout needs adjustment.
Front Zone — Highest Frequency
Tape, pencils, and primary fasteners. Access without looking or rotating the torso.
Side Zone — Task Support
Knife, chisel, drivers, and level. Close enough for quick transitions.
Rear Zone — Secure Carry
Hammer loop and lower-frequency items that do not require visual access.
Four Placement Rules
Most-used tools go in front pockets where your hands naturally fall.
Nails, screws, and fasteners get dedicated compartments—never one mixed pile.
Secure sharp and heavy tools low and outward, away from the body.
Tools used consecutively should sit side by side to reduce unnecessary motion.
Leather, Nylon or Canvas?
There is no universal winner. Match the material to exposure, load, maintenance habits, and how much structure you want from the pouch.
| Material | Durability | Water Resistance | Flexibility & Weight | Best Fit |
|---|---|---|---|---|
| Leather | ✓ HighResists wear and develops a durable fit when properly conditioned. | ~ GoodHandles moisture when treated; untreated leather can absorb water. | ~ ModerateStructured and initially stiff, but softens with use. Typically heavier. | Framers who value structure, longevity, and a traditional feel. |
| Nylon | ✓ Very HighTear-resistant construction performs well under rough handling. | ✓ ExcellentQuick-drying and highly suitable for wet or changing conditions. | ✓ HighLightweight and flexible, reducing bulk during extended wear. | Demanding jobs where low weight and weather resistance lead. |
| Canvas | ~ GoodSturdy, though edges can fray without reinforcement. | ✗ VariableCoated versions resist water; untreated canvas absorbs moisture. | ✓ FlexibleComfortable and pliable, but offers less structural support. | Moderate-duty work and framers who prefer a softer, adaptable pouch. |
Customize by Workflow
A useful layout follows the order of your work. Review the day, configure the belt, test it under movement, then remove anything that fails to justify its weight.
Audit the Job
List the tasks and tools actually required for the day.
Rank Frequency
Separate constant-use tools from occasional support items.
Assign Zones
Front for frequent, side for support, rear for secure carry.
Balance the Load
Distribute the 10–20 pound working load across both hips.
Test & Refine
Walk, bend, climb, reach, and adjust any shifting pockets.
Measuring → Nailing
Place tape, pencil, and fasteners next to one another so the most common work sequence happens with minimal hand travel.
Modular by Default
Clip on specialty pouches only when needed. A lighter baseline setup lowers fatigue while preserving flexibility for changing conditions.
Five Developments Worth Watching
Composite Fabrics
High-strength materials reduce weight without surrendering durability.
Clip-On Modules
Swap pockets and holders as tasks and job sites change.
Padded Support
Contoured belts and adjustable straps improve load distribution.
Digital Storage
Protected pockets secure phones and laser distance meters.
Safety Details
Reflective strips and quick-release buckles add visibility and control.
IS FASTER
Every unnecessary tool adds weight, movement, and decision friction. The strongest setup is not the fullest pouch—it is the lightest configuration that handles the expected work safely.
Before You Buckle Up
What are the must-have tools?
Hammer, tape measure, pencils, fasteners, screwdrivers, chisel, compact level, and utility knife.
How do I improve comfort?
Use a padded, adjustable belt; keep the load close to the hips; and balance weight across both sides.
Which material is most versatile?
Heavy-duty nylon is a strong all-rounder because it combines low weight, flexibility, and water resistance.
What safety features matter?
Look for secure tool sleeves, reinforced stitching, reflective elements, ergonomic shaping, and a quick-release buckle.
How to Pick the Right Tools for Your Pouch — Focus on What Matters Most
Choosing the right tools for your pouch is the first step. Not every tool belongs in your belt, but every job needs the essentials close at hand. Think about the core tasks — framing, measuring, nailing — and select tools that match. For example, a framer’s pouch should always have a hammer, a tape measure, pencils, and a few nails or screws. Keep in mind, the goal is quick access, not carrying every tool you own. Use a small, compartmentalized pouch to keep screws separate from nails, and reserve a dedicated spot for your tape measure to prevent losing it in the chaos of a busy day.
Prioritizing the right tools ensures you’re prepared for common tasks without the clutter of unnecessary items. This balance reduces decision fatigue and streamlines your workflow. Carrying only what’s essential also minimizes the weight you have to lug around, reducing fatigue and the risk of injury over long days. The tradeoff is that you might need to make quick trips to your toolbox if you forget a specialized tool, so consider your typical job scope when selecting what to keep on hand.
As an affiliate, we earn on qualifying purchases.
How to Organize Your Tool Pouch for Fast Access — Make Every Second Count
- Prioritize the most-used tools: Keep your hammer, tape measure, and pencils in the front pockets where your hands naturally rest. This ensures minimal movement and quick retrieval, which is crucial when every second counts on a busy site.
- Separate small items: Use smaller pouches or dividers for nails, screws, and fasteners. This prevents digging through a jumble of fasteners when you need just one, saving time and reducing frustration.
- Keep dangerous tools away from your body: Store sharp or heavy tools lower on your waist to prevent injury if you fall or bump into something. Proper placement isn’t just about safety; it also helps maintain balance and prevents accidental injuries during quick movements.
- Adjust for your workflow: If you frequently switch between measuring and nailing, position those tools side by side for quick transition. Understanding your work pattern allows you to arrange your tools in a way that minimizes unnecessary reaching or repositioning, keeping you efficient and reducing fatigue.
For example, a framer might keep a chisel, a few screwdrivers, and a utility knife in side pockets, so they’re ready when needed without rummaging through the main pouch. Thoughtful organization directly impacts your speed and safety, making your workday smoother and less stressful.
As an affiliate, we earn on qualifying purchases.
Comparison of Key Materials for Durable Pouches — Leather, Nylon, and Canvas
| Material | Durability | Water Resistance | Flexibility |
|---|---|---|---|
| Leather | High — resistant to wear and tear, ages well with proper care, developing a unique patina that can extend lifespan if maintained properly. | Good — ages well with proper care, but can absorb water if untreated, which might lead to cracking or deterioration over time if not conditioned. | Moderate — initially stiff but softens over time, providing a comfortable fit once broken in. The tradeoff is that it can be heavier and less flexible when new. |
| Nylon | Very high — tear-resistant and can withstand rough handling, making it ideal for demanding environments. | Excellent — water-resistant and quick-drying, reducing the risk of tools rusting or pouch materials deteriorating in wet conditions. | High — lightweight and flexible, allowing for easier movement and less bulk during extended wear. |
| Canvas | Good — sturdy but can fray or wear out over time if not reinforced or maintained properly. | Variable — water-resistant if coated, but untreated canvas can absorb moisture, risking mold or mildew if not dried properly. | Flexible — comfortable for all-day wear, but may lack the structural support of leather or nylon, which can affect tool security. |
For heavy-duty jobs, nylon often wins for its lightweight strength and water resistance, which help keep tools dry and the pouch light, reducing fatigue. Leather, while offering classic durability and a professional look, requires more maintenance and is generally heavier. Canvas strikes a balance but needs proper treatment to be fully water-resistant. The choice hinges on your specific work conditions and personal preference, but understanding these tradeoffs helps you make a more informed decision.
modular tool pouch for construction
As an affiliate, we earn on qualifying purchases.
As an affiliate, we earn on qualifying purchases.
How to Customize Your Pouch Setup for Your Workflow — Tailor for Faster, Safer Work
Every framer’s workflow is a bit different. Customization makes a huge difference. Start by analyzing your daily tasks. Do you often measure, then switch to nailing? Adjust pouch placement accordingly. For example, if you prefer quick access to your tape and pencils, place them on the front pockets. Use modular pouches that clip on or off your belt, so you can swap setups for different jobs. This way, you’re not stuck with one bulky system that slows you down. Think of it like building a toolbox that adapts to your day’s needs, not the other way around.
Customizing your setup allows you to streamline your workflow by placing tools where they’re most needed, reducing unnecessary movements. This not only saves time but also minimizes fatigue caused by repetitive reaching or awkward postures. The tradeoff is that frequent adjustments may require a slight initial investment of time, but the long-term gains in efficiency and safety are well worth it. Modular systems also enable quick reconfiguration if job conditions change unexpectedly, keeping you adaptable and safe at all times.
ergonomic tool pouch for carpenters
As an affiliate, we earn on qualifying purchases.
As an affiliate, we earn on qualifying purchases.
Recent Innovations That Make Your Tool Pouch Smarter and Safer
New materials and design ideas are changing how framers use their pouches. Lightweight composite fabrics reduce weight without sacrificing strength, which helps prevent fatigue during long days. Modular systems let you customize your setup on the fly, so you can adapt quickly to different tasks or job sites. Padded belts and ergonomic pouches cut down fatigue and improve comfort, allowing you to work longer with less strain. Some setups now include pockets for smartphones or laser distance meters—tools that keep you precise and connected, reducing errors and rework. Reflective strips and quick-release buckles also boost safety, especially when working in low light or at height, making it easier to stay visible and secure. For example, a framer might clip a laser tool onto a modular pouch for quick access, saving precious seconds on each measurement and maintaining safety standards.
Frequently Asked Questions
What are the must-have tools for a framer’s tool pouch?
A framer’s pouch should always hold a hammer, tape measure, pencils, nails or screws, screwdrivers, a level, and a utility knife. These cover most basic framing tasks and are quick to grab.How do I organize my tool pouch for maximum efficiency?
Keep your most-used tools in front or in easy-to-reach pockets. Use small dividers or pouches for fasteners, and place dangerous or heavy tools lower on your belt for safety. Regularly assess your setup to streamline workflow.What materials are best for a durable tool pouch?
Heavy-duty nylon and leather stand out for durability and weather resistance. Nylon is lightweight and tear-resistant, while leather offers age-worn toughness. Choose based on your climate and work style.How can I make my tool setup more comfortable?
Use padded belts and adjustable straps to distribute weight evenly. Position heavier tools lower on your waist, and keep frequently used items at the front for quick access. Comfort reduces fatigue and injury risk.Are modular or customizable options available?
Yes, many brands offer clip-on or snap-on pouches that let you tailor your setup. Modular systems help you adapt quickly to different jobs, keeping your tools organized and accessible.Conclusion
A well-organized tool pouch isn’t just about carrying tools — it’s about working smarter, safer, and faster. Invest a little time tailoring your setup, and you’ll notice the difference every day on the job site. Remember, a few simple adjustments now can save hours of frustration later. Keep your tools close, your setup simple, and your focus sharp. That’s how real framers stay ahead.Halloween Picks
halloween
As an affiliate, we earn on qualifying purchases.